Best Electric Bike Tire Pressure for Paved Roads
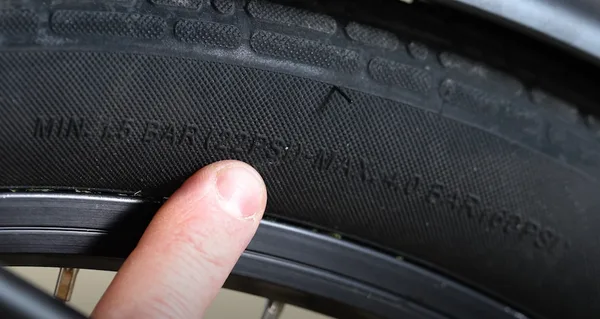
Image source: Bing (Web (fair-use with source credit))
Figuring out what electric bike tire pressure is best for paved roads isn't about picking a random number. It’s about balancing weight, speed, and comfort. Most riders guess wrong because they treat e-bikes like standard bicycles.
That mistake costs you range and risks blowouts.
E-bikes are heavier due to batteries and motors. This extra mass demands higher air volume support. Manufacturer specs often list ranges between 40 and 80 PSI.
We’ll break down exactly where you fit in that spectrum. Let’s look at the variables that actually matter for your setup.
Quick Answer
For most paved-road e-bikes, aim for 50-65 PSI. Heavier riders or cargo loads need 65-75 PSI. Lighter setups might drop to 45-55 PSI.
Always check your tire sidewall for the maximum rating. Never exceed that limit. Adjust based on comfort and grip needs.
Puncture protection improves with slightly higher pressure. Range increases when rolling resistance drops. Test small increments to find your sweet spot.
The 3-Variable Formula for Perfect Pavement PSI
Generic advice fails here. You need a personalized calculation. Three specific factors determine your ideal pressure.
Ignore any one of them, and you’ll suffer consequences. These aren’t opinions; they’re physics.
First, consider total system weight. This includes you, the bike, and any gear. E-bikes weigh significantly more than analog bikes.
A 50-pound frame plus a 200-pound rider equals 250 pounds. Standard bike charts don’t account for this. You must add pressure to support that load.
Under-inflation causes pinch flats. Over-inflation hurts traction.
Second, evaluate tire width. Wider tires hold more air volume. They can run lower pressures comfortably.
Narrow road tires need higher PSI to prevent burping. Fat tires on pavement still need decent pressure. Don’t assume "wide" means "low." It means "stable."
Third, assess riding style and surface quality. Smooth concrete allows higher speeds. Rough asphalt demands a bit more cushion.
Aggressive cornering requires firmer casings. Casual commuting tolerates softer rides. Match your pressure to how you ride.
Not just how much you weigh.
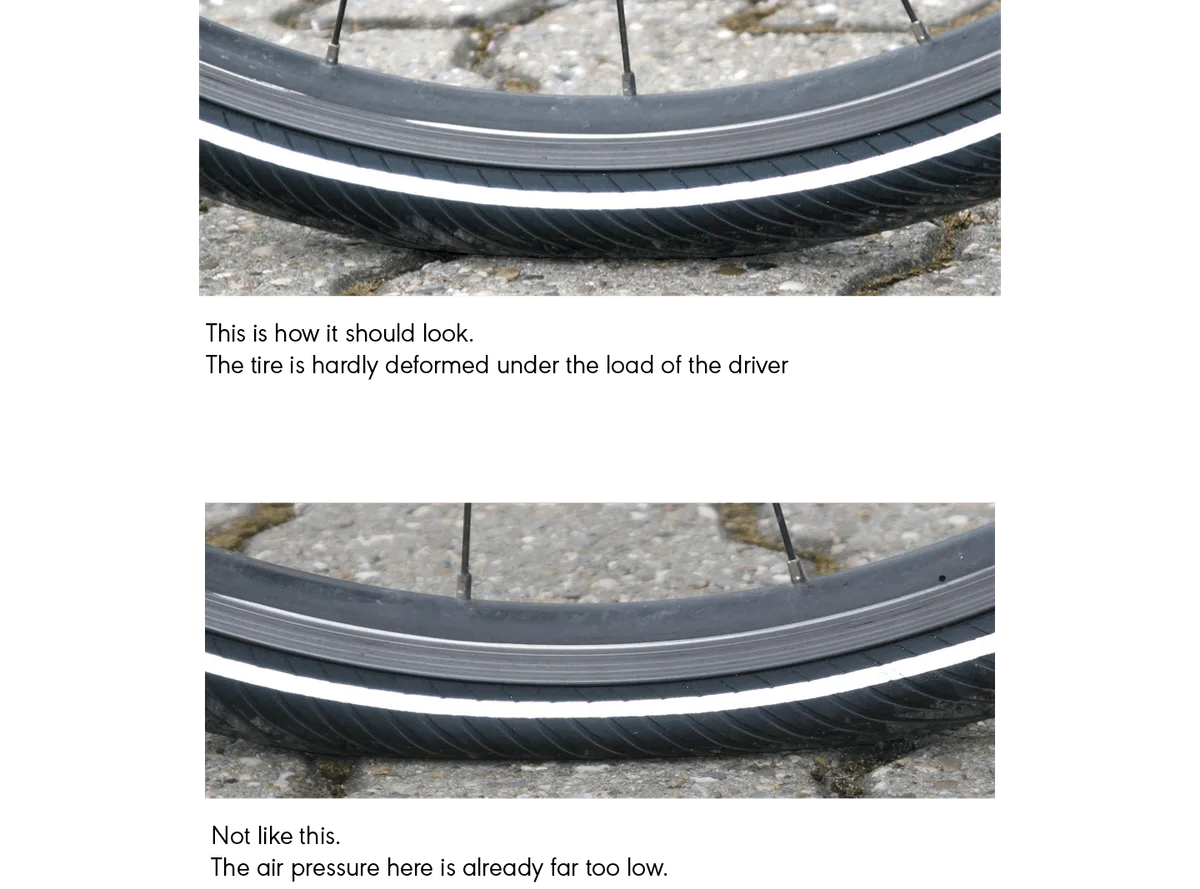
Here’s a quick reference table to guide your initial setting. Use it as a baseline, then adjust. Remember, these numbers assume standard commuter tires (35mm-47mm).
| Rider + Bike Weight | Tire Width | Starting PSI (Front/Rear) | Adjustment Note |
|---|---|---|---|
| Under 180 lbs | 35-40mm | 50 / 55 | Add 5 PSI if carrying panniers |
| 180-220 lbs | 40-47mm | 55 / 60 | Check sidewall max before exceeding |
| 220-260 lbs | 47-50mm | 60 / 65 | Prioritize rear tire stability |
| Over 260 lbs | 50mm+ | 65 / 70 | Consider reinforced e-rated tubes |
This formula prevents the two biggest errors. It stops you from running too soft and hitting the rim. It also keeps you from running rock-hard and losing control.
Find your balance point. Start within five PSI of the recommended range. Ride a few miles.
Assess the feel. Then tweak accordingly.
Step-by-Step: How to Dial In Your Front and Rear Tires
Precision matters. Eyeballing pressure leads to inconsistency. Follow this workflow to lock in your settings.
It takes ten minutes but saves hours of frustration later.
Start with cold tires. Air expands when heated. Riding warms up the rubber and internal air.
Measuring hot gives false high readings. Wait until the bike sits idle for an hour. Or measure first thing in the morning.
Accuracy starts here.
Use a calibrated floor pump. Hand pumps vary wildly in gauge reliability. Digital gauges offer better precision.
Ensure your pump reads accurately against a known standard. If possible, cross-check with a separate digital gauge. Discrepancies of 3-5 PSI are common and problematic.
Inflate the front tire first. Front wheels carry less weight on e-bikes. Typically, 40% of the load rests there.
Set it according to your weight class from the table above. For many, this lands around 55 PSI. Squeeze the tire sidewall.
It should feel firm but not brick-like.
Next, tackle the rear tire. This wheel bears more weight. Motors often drive through the rear hub too.
Torque adds stress to the casing. Increase pressure by 5-10 PSI over the front. This compensates for dynamic loads.
Prevents squirming during acceleration. Keeps contact patch consistent.
Finally, perform a bounce test. Lift the front wheel six inches off the ground. Drop it.
Listen to the impact sound. A dull thud means under-inflated. A sharp ping suggests over-inflated.
Aim for a solid, muted knock. Repeat for the rear. Adjust in 2-PSI increments until satisfied.
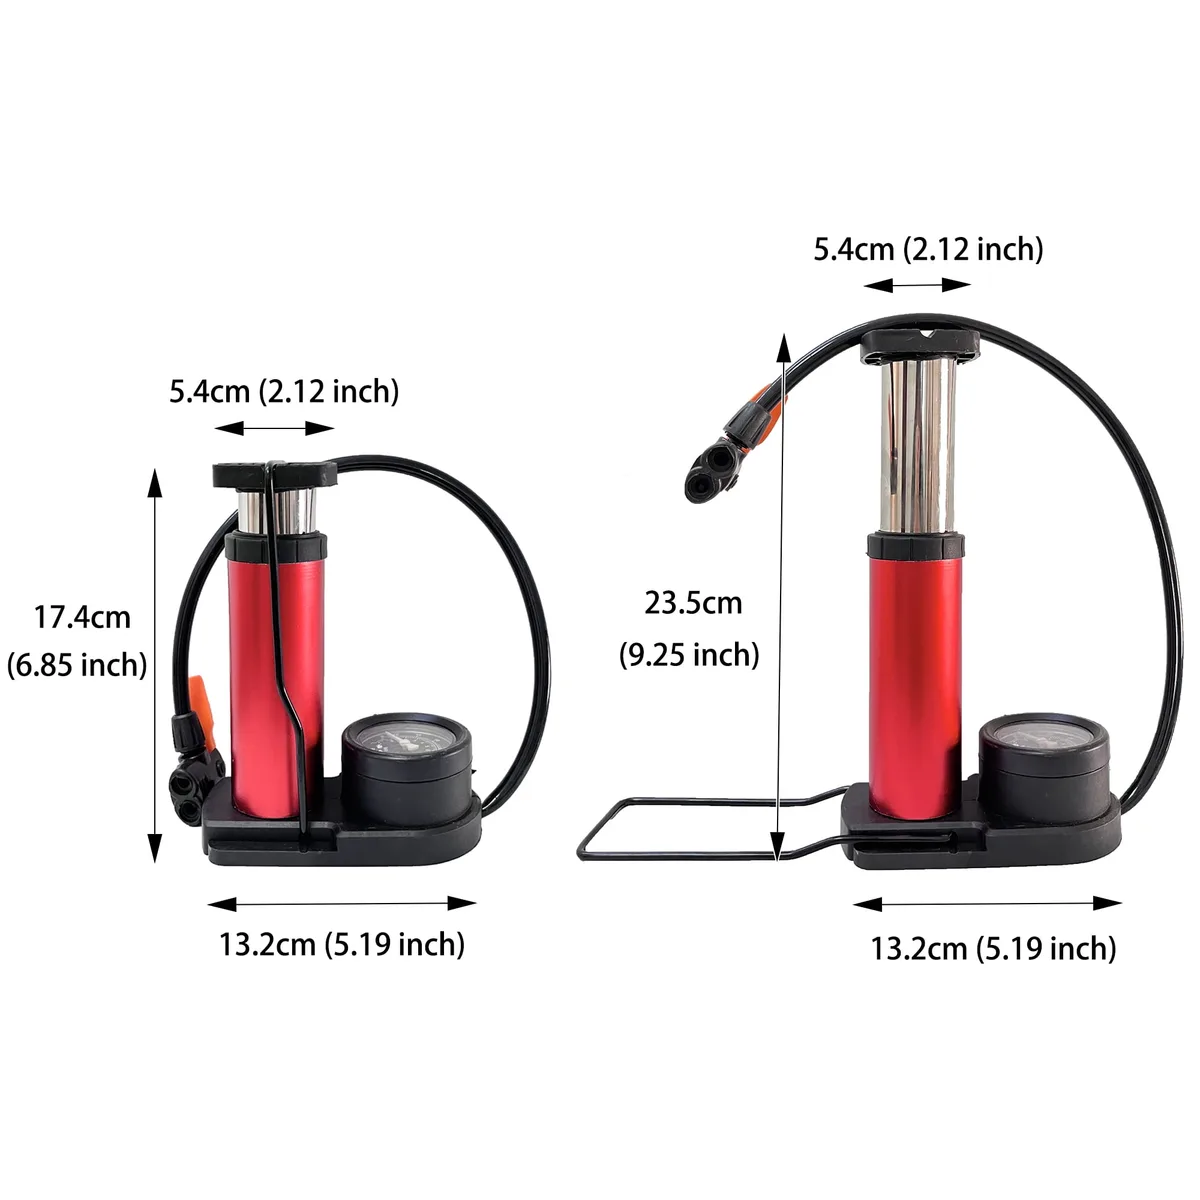
Record your final numbers. Tape them inside your helmet or phone case. Memory fades.
Data doesn’t. Revisit these settings seasonally. Temperature changes affect air pressure.
Cold weather lowers PSI. Hot weather raises it. Compensate proactively.
Don’t wait for a flat to remind you.
When to Break the Rules: Cargo, Weather, and Road Quality
Standard formulas provide a baseline. Real-world conditions demand deviations. Knowing when to adjust separates casual riders from smart operators.
Context dictates pressure.
Heavy cargo changes everything. Adding panniers shifts weight distribution. It stresses the rear tire disproportionately.
Increase rear PSI by 10-15%. Front adjustments depend on handlebar bags. Usually, minor tweaks suffice.
Never ignore added mass. Pinch flats love overloaded rims. Check manufacturer load limits.
Exceeding them voids warranties. Risky business indeed.
Wet pavement reduces friction. Water acts as a lubricant between rubber and road. Lower pressure increases the contact patch area.
More rubber touches the ground. Better grip results. Drop PSI by 5-10% in rain.
But beware hydroplaning at high speeds. Balance is key. Too low feels mushy.
Too high slips easily. Monitor handling closely.
Rough urban roads punish stiff setups. Potholes crack rims. Sharp debris pierces thin casings.
Soften pressure slightly to absorb impacts. Adds comfort. Reduces vibration fatigue.
Protects suspension components indirectly. However, avoid going below minimum safe levels. Rim damage remains a threat.
Inspect tires frequently after rough routes. Look for cuts or bulges. Early detection saves lives.
High-speed touring favors efficiency. Aerodynamic drag decreases with smaller contact patches. Higher pressure rolls faster.
Less energy wasted deforming rubber. Boost PSI to upper recommended limits. Only do this on smooth surfaces.
Bumps hurt more at speed. Stability becomes critical. Firm tires resist wobble.
Trust the physics. Speed demands precision.
Seasonal shifts require attention. Summer heat expands air. Winter cold contracts it.
A 30-degree Fahrenheit swing alters pressure noticeably. Check gauges monthly during transitions. Adjust before riding long distances.
Consistency ensures predictable handling. Surprise failures ruin trips. Stay ahead of the curve.
Adaptability defines expertise.
Common Mistakes That Kill Range or Cause Blowouts
Errors happen. Some are minor inconveniences. Others destroy equipment or endanger riders.
Recognizing these pitfalls helps you avoid them. Awareness is your first defense.
Ignoring sidewall ratings is dangerous. Manufacturers print maximum PSI clearly. Exceeding it risks catastrophic failure.
Rubber stretches beyond tolerance. Blows occur suddenly. No warning signs precede rupture.
Respect the hard limit. Even if it feels comfortable. Physics doesn’t negotiate.
Safety trumps preference always.
Using non-e-rated tires invites trouble. Standard bicycle tires lack reinforcement. E-bike torque shears carcass layers.
Premature wear develops quickly. Flats become frequent. Performance degrades silently.
Invest in proper e-bike certified rubber. Costs more upfront. Saves money long-term.
Durability matters immensely. Cheap options prove expensive eventually.
Neglecting regular checks erodes safety. Air permeates through rubber slowly. Losses accumulate unnoticed.
Under-inflation creeps in gradually. Handling worsens incrementally. Riders adapt subconsciously.
Then disaster strikes unexpectedly. Establish a weekly routine. Five seconds saves headaches.
Discipline builds reliability. Laziness costs dearly.
Over-relying on online charts misleads users. Generic tables ignore individual nuances. Body position affects weight distribution.
Gear choices alter totals. Terrain varies locally. Blind adherence creates mismatches.
Use charts as starting points only. Fine-tune through experience. Personal data beats averages.
Trust your bike’s feedback. Adapt continuously.
Misinterpreting "firmness" leads to errors. Hard plastic feel differs from pneumatic stiffness. Subjective touch tests fail often.
Gauges provide objective truth. Rely on instruments, not fingers. Calibrate tools regularly.
Verify accuracy annually. Precision prevents guesswork. Confidence stems from correctness.
Measure twice, ride once.
These mistakes compound negatively. One error masks another. Combined effects amplify risks.
Vigilance breaks the cycle. Educate yourself thoroughly. Share knowledge responsibly.
Community learning strengthens everyone. Avoid isolation in maintenance. Ask questions freely.
Seek verified answers. Expertise grows collectively.
Maintenance Checkpoints: Keeping Pressure Stable Over Time
Tire pressure isn't a set-and-forget metric. Air permeates through rubber naturally, even with high-quality tubes. You’ll lose 2-5 PSI per week depending on temperature and material quality.
This gradual drop affects handling long before you notice it. Weekly checks are non-negotiable for consistent performance.
Use a digital gauge for accuracy. Analog dials often drift or stick. A cheap digital unit provides precise readings every time.
Calibrate your pump annually against this reference. If the variance exceeds 3 PSI, replace the seal kit. Neglecting calibration leads to systematic errors.
Your "correct" pressure might actually be dangerously low.
Inspect valves regularly for leaks. Schrader valves can loosen over time due to vibration. Tighten them gently if they feel wobbly.
Presta valves require locking nuts to stay secure. Check for corrosion around the stem base. Replace damaged cores immediately.
Small leaks become big problems quickly. Don’t wait for a flat tire to act.
Seasonal changes demand proactive adjustments. Cold air contracts, dropping pressure significantly. In winter, add 3-5 PSI to compensate.
Hot summer days expand air, raising pressure. Bleed off excess if readings spike above safe limits. Monitor trends rather than single snapshots.
Consistency prevents surprise failures mid-ride. Adapt your routine to the calendar.
Store bikes properly when not in use. Avoid leaving tires under full load for months. Hang the bike or rotate wheels periodically.
Flat spots develop from static weight distribution. These imperfections cause vibrations at speed. Rotate tires front-to-back every 1,000 miles.
Even wear extends lifespan dramatically. Simple habits save expensive replacements.
Track mileage alongside pressure logs. Note when you last inflated each tire. This data reveals leak rates specific to your setup.
If one tire loses pressure faster, investigate the tube. Pinholes or valve defects hide easily. Data-driven maintenance beats reactive repairs.
Stay ahead of degradation curves.
FAQ: Quick Answers for Specific E-Bike Scenarios
Can I use car tire pressure guidelines for my e-bike?
No. Car tires handle vastly different loads and speeds. Their construction ignores pedaling torque dynamics.
E-bikes need specialized casing reinforcement. Using automotive logic risks blowouts. Stick to bicycle-specific standards.
Consult manufacturer manuals exclusively. Safety depends on correct engineering assumptions.
Why does my rear tire feel harder than the front?
Weight distribution favors the rear axle. Batteries and motors sit centrally or behind. This concentrates mass on the back wheel.
Higher pressure compensates for increased load. Front tires carry less static weight. Adjust accordingly for balanced handling.
Uniform pressure creates instability. Respect the physics of your frame.
Should I lower pressure for better comfort on rough pavement?
Only slightly. Dropping below minimum ratings causes pinch flats. The rim hits obstacles directly.
Damage accumulates invisibly inside the casing. Instead, upgrade to wider tires. Larger volume absorbs shocks naturally.
Maintain safe PSI levels always. Comfort shouldn’t compromise structural integrity. Choose gear that fits your needs.
How often should I replace inner tubes on an e-bike?
Every 6-12 months with regular use. Heat from motor friction degrades rubber. Thin walls weaken over time.
Inspect for bulges or cracks monthly. Replace preemptively if signs appear. New tubes ensure reliability.
Old ones invite failure. Preventative swaps cost little. Peace of mind is priceless.
Do tubeless setups change optimal pressure recommendations?
Yes, marginally. Tubeless systems allow lower pressures safely. Sealant plugs small punctures instantly.
Reduced rolling resistance improves range. However, burping remains a risk. Stay within manufacturer bounds.
Experiment cautiously downward. Monitor for air loss daily. Benefits outweigh complexity for many riders.
Try it if skilled.

Similar Posts