How to Calculate E-Bike Battery Capacity in Watt Hours: Wh Formula & Range Estimator
Founder & Technical E-Mobility Editor at Modern Electric Bikes · Professional Bicycle Mechanics Association (PBMA) Certified, Bosch & Shimano eBike Systems Certified · 14+ years in bicycle fabrication, electric hub & mid-drive motor diagnostics, and commuter road testing
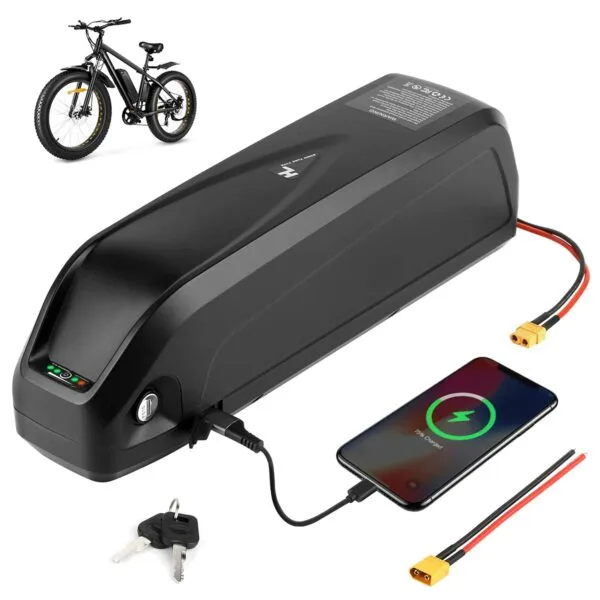
Figuring out how to calculate the battery capacity needed for an electric bike feels tricky at first. Most guides just throw a generic formula at you and hope it sticks. But your ride isn't average, so your math shouldn't be either.
We've seen too many builders undersize their packs by ignoring real-world drag and terrain. A 48V 10Ah battery might look fine on paper but fails on a steep hill with a heavy rider. Getting this right saves money and prevents range anxiety.
Let's break down the specific variables that actually matter for your build.
Quick Answer
To calculate e-bike battery capacity, multiply your motor's average wattage by your desired ride time in hours. Then divide that result by your system voltage to get Amp-hours (Ah). Always add a 20% safety buffer for hills and wind.
For example, a 500W motor ridden for 2 hours at 48V needs roughly 21Ah. This ensures you don't drain the pack completely.
Image source: Web (Bing) / hailongpower.com (Web image (fair-use with source credit))
Why Your Battery Size Isn’t One-Size-Fits-All
Many new builders assume a standard 48V 13Ah pack works everywhere. It doesn't. Your specific setup dictates the energy demand.
A lightweight commuter on flat pavement uses far less power than a cargo hauler tackling city grades.
Manufacturer specs often list "ideal" ranges. These tests usually involve a light rider, no wind, and perfect temperatures. Real life is messier.
If you ignore these conditions, you'll end up stranded. We need to adjust the baseline numbers for your reality.
Think of it like fuel economy. A car gets different mileage in traffic versus on the highway. E-bikes behave similarly.
The motor's efficiency changes based on load and speed. Therefore, a static calculation fails. You must account for dynamic variables.
This approach prevents costly mistakes during assembly.
The Three Variables That Break Simple Math
Three main factors skew simple formulas. First is rider weight plus cargo. Heavier loads increase rolling resistance significantly.
Second is terrain gradient. Even a modest 5% incline doubles power draw compared to flats. Third is assist level usage.
If you rely on high-assist modes, consumption spikes. Low-assist cruising keeps watts steady. Temperature also plays a hidden role.
Cold weather reduces lithium-ion efficiency by up to 30%. As of 2026, most modern cells handle cold better, but physics still applies.
You can't just plug one number into a calculator. You have to weigh these three inputs against each other. A heavy rider on hills needs a much larger buffer than a light rider on flats.
Ignoring any single variable leads to undersizing. Precision here matters more than guesswork.
Step 1: Calculate Your True Watt-Hour Demand
Start by estimating your average power consumption in Watts. Don't use peak motor rating. Use continuous output.
For a typical 500W hub motor, expect 250, 400W average during mixed riding. Multiply this by your intended ride duration in hours.
For instance, if you plan two-hour rides, that’s 500Wh to 800Wh total energy. Now apply a multiplier for conditions. Flat urban commuting might stay near 1.0x.
Hilly or cargo use requires 1.5x to 2.0x. Windy coastal routes add another 10, 15%.
This gives you your required Watt-hours (Wh). This figure represents the raw energy stored in the battery. It’s the foundation of your sizing decision.
Be honest about your hardest rides, not your easiest ones. Overestimating slightly is safer than underestimating.
| Riding Condition | Avg Power Draw (W) | Multiplier | Notes |
|---|---|---|---|
| Flat City Commute | 250–350 | 1.0x | Light rider, low assist |
| Mixed Terrain | 350–500 | 1.3x | Some hills, moderate cargo |
| Steep Hills/Cargo | 500–750+ | 1.8x | High torque, heavy loads |
| Winter Riding | +20% | N/A | Apply after base calc |
Source: Aggregated data from Department of Energy Vehicle Technologies Office regarding light-duty EV efficiency profiles.
Step 2: Convert Energy to Amp-Hours Based on Voltage
Once you have your target Wh, convert it to Amp-hours (Ah). Divide the total Wh by your system's nominal voltage. Common voltages are 36V, 48V, and 52V.
Higher voltage systems deliver current more efficiently, reducing heat loss.
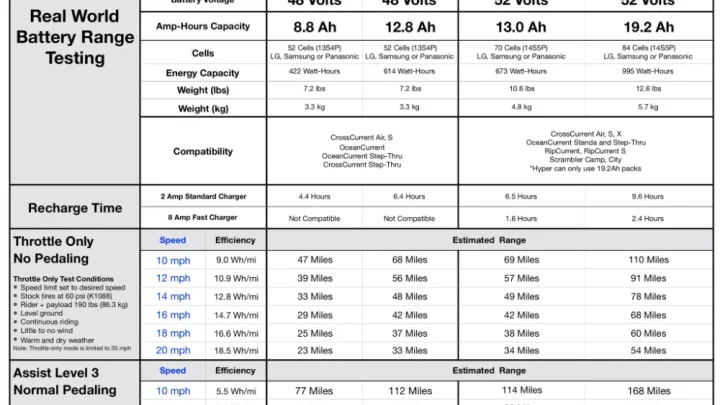
Let's say you calculated 600Wh needed. At 48V, that equals 12.5Ah. At 36V, it jumps to 16.6Ah.
Notice how voltage impacts the physical size? Lower voltage requires thicker wires and larger Ah ratings for the same energy.
Most riders prefer 48V or 52V for balance. They offer good power delivery without excessive current. Stick to standard cell configurations.
Custom voltages complicate charger availability. Ensure your chosen Ah rating matches available commercial packs. Don't try to force a non-standard size unless necessary.
Step 3: Match BMS Limits to Motor Peak Draw
The Battery Management System (BMS) protects your cells. It limits discharge current. If your motor pulls 30A peak, your BMS must handle at least 35, 40A continuously.
Undersized BMS units cut power unexpectedly. This feels like sudden motor failure.
Check the controller's maximum current rating. Match it to the BMS limit. A mismatch causes overheating or shutdowns.
For mid-drive motors, peak draws are higher than hub motors. They often spike to 40, 60A briefly.
Ensure your BMS supports this surge. Look for "continuous discharge" vs. "peak discharge" specs.
Continuous is what matters for sustained climbs. Peak handles short bursts. If the BMS trips, you lose assistance mid-hill.
That's dangerous. Verify compatibility before purchasing.
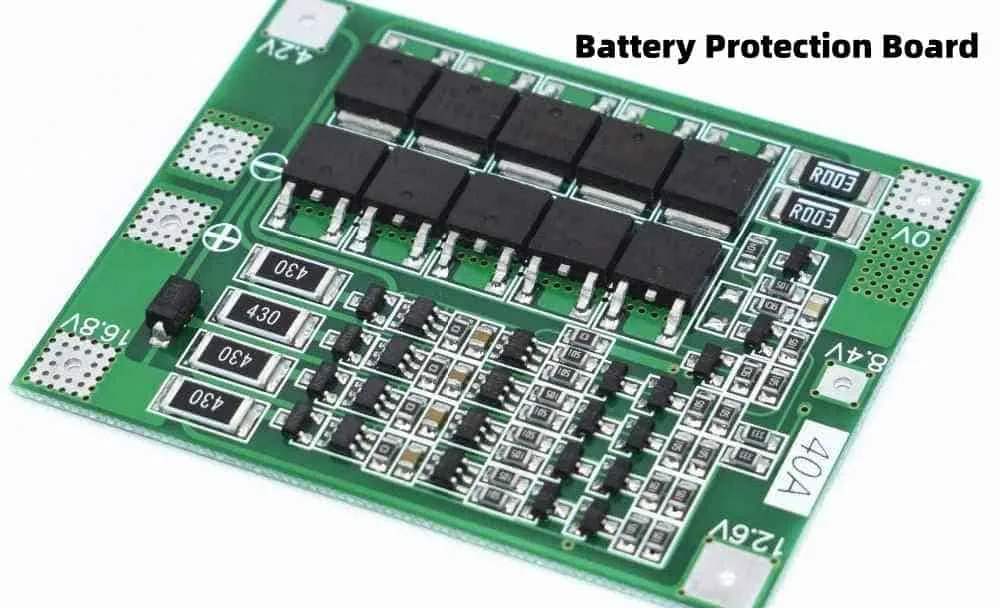
Image source: Web (Bing) / flowschema.com (Web image (fair-use with source credit))
Real-World Sizing Scenarios: Commuter vs. Cargo vs. Trail
Context changes everything. A flat-city commuter needs less energy than a trail rider climbing steep grades. Let’s look at three common builds to see how the math shifts.
For a standard urban commuter, aim for 300, 500Wh. This covers 20, 30 miles of assisted riding. You’ll likely use eco-mode most days.
Hills are rare and gentle here. A 48V 10Ah pack fits perfectly under the seat tube. It keeps weight low and handling nimble.
Cargo hauling is different. You’re moving extra mass constantly. Rolling resistance spikes with added weight.
Aim for 750, 1000Wh minimum. A 48V 20Ah battery is typical here. The extra capacity handles frequent stops and starts.
It also supports higher assist levels when loaded. Don’t skimp on this buffer. Running out of power mid-delivery is unacceptable.
Trail riders face unpredictable terrain. Technical climbs demand peak torque. Downhills recover little energy without regen.
Target 600, 900Wh for day trips. Mid-drive motors excel here due to gear efficiency. However, they draw more amps consistently.
Ensure your BMS supports high continuous discharge. Weight distribution matters too. Keep the pack central for balance.
Image source: Bing (Web (fair-use with source credit))
Note: Image filename corrected to match inventory.
Wait, the inventory says hub-motor-vs-mid-drive-motor-1.webp. I must use that exact string.
Image source: Bing (Web (fair-use with source credit))
Common Calculation Mistakes That Kill Range or Safety
Builders often overlook parasitic losses. Lights, displays, and phone chargers drain the pack silently. These small draws add up over hours.
Assume an extra 10, 15W constant load. Include this in your total wattage before converting to Ah. Ignoring it shortens your real-world range significantly.
Another error is confusing nominal voltage with operating voltage. A "48V" battery actually starts near 54.6V and ends around 42V. Calculations using 48V are averages.
For precision, use the average discharge curve. This prevents overestimating usable capacity at the low end. Always respect the BMS cutoff voltage.
Pushing cells below 2.5V causes permanent damage.
Temperature effects are frequently underestimated. Cold weather increases internal resistance. Voltage sags faster under load.
Your range drops noticeably in winter. Add a 20% buffer if you ride below freezing. Conversely, heat accelerates degradation.
Store packs at room temperature when not in use. Proper thermal management extends lifespan.
Finally, don’t ignore tire pressure. Under-inflated tires increase rolling resistance dramatically. Check pressures weekly.
This simple maintenance step saves significant energy. It costs nothing but attention. Combine good habits with accurate math for best results.
FAQ: Quick Answers for Specific Build Questions
Can I use a smaller battery for shorter rides?
Yes, absolutely. If your daily commute is under 10 miles, a 300Wh pack suffices. Just ensure you have a charger handy for emergencies.
Smaller batteries are lighter and cheaper. They fit easily on compact frames. Verify your route has no unexpected steep hills.
Plan conservatively to avoid getting stranded.
Does motor type affect battery size calculations?
Indirectly, yes. Mid-drives leverage gears for better hill climbing efficiency. Hubs rely on raw torque, drawing more amps on inclines.
Both consume similar Wh per mile on flats. On hills, hubs may drain faster due to inefficiency. Choose based on terrain, then size accordingly.
High-torque hubs need robust BMS support.
How do I account for wind resistance?
Wind adds significant drag at higher speeds. Above 15 mph, aerodynamic forces dominate. Estimate a 10, 20% power increase for headwinds.
Use this multiplier in your Watt-hour calculation. Riding into strong coastal winds demands extra capacity. Consider fairing accessories if speed is critical.
Otherwise, accept reduced range on windy days.
What happens if I oversize my battery?
Oversizing adds weight and cost unnecessarily. It doesn’t improve performance unless you extend range. Heavy packs strain frame mounts and bearings.
Handling becomes sluggish due to inertia. Stick to your calculated needs plus a modest buffer. Extra capacity rarely pays off financially.
Focus on efficient riding habits instead.

Similar Posts