How to True an E-Bike Wheel at Home: Easy DIY Guide
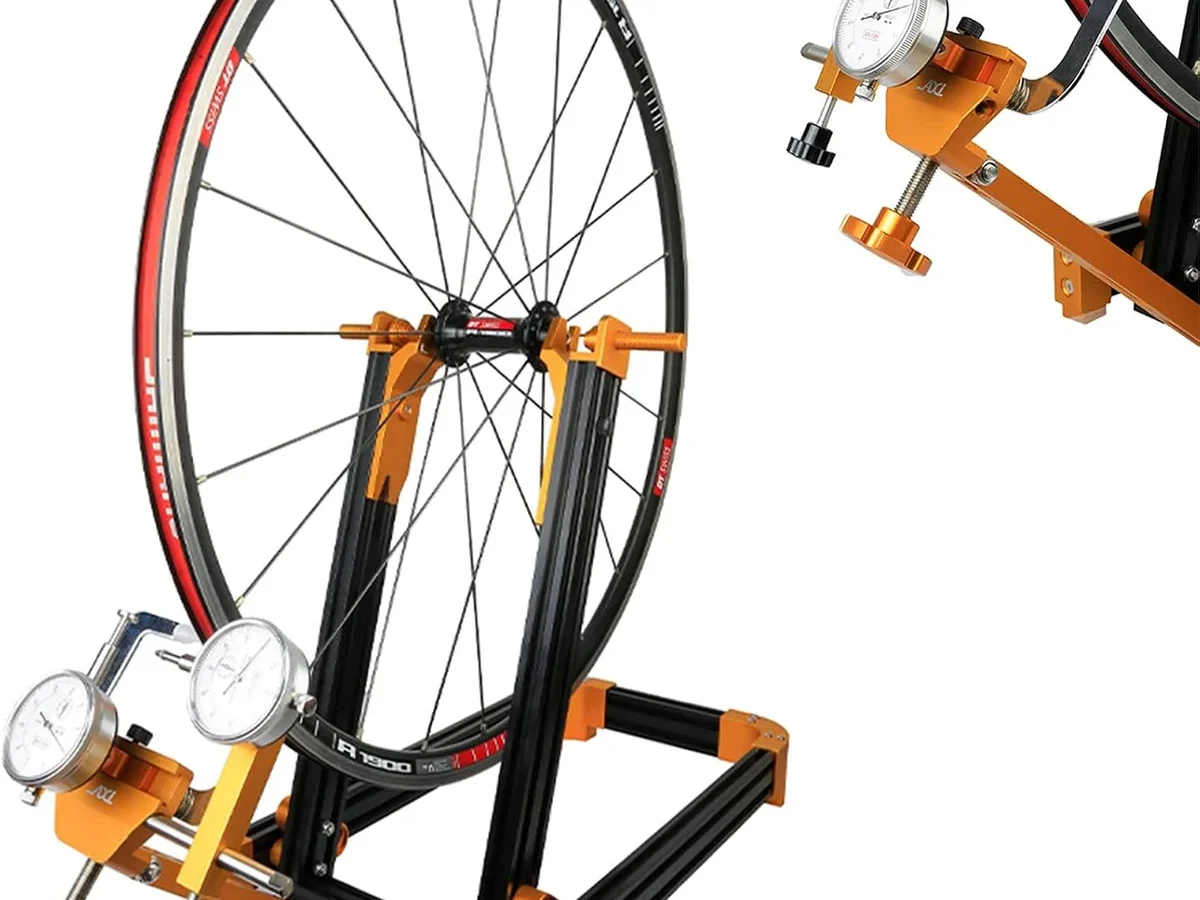
Figuring out how to true an electric bike wheel at home starts with accepting that your eyes alone aren't enough. E-bike wheels carry heavier loads and spin faster than standard bicycles, meaning even tiny deviations cause noticeable wobble or brake rub. You need precise visual feedback to correct lateral runout effectively without stripping spokes.
Our research confirms that proper truing requires a dedicated stand for accuracy. Manufacturer specifications indicate rear e-bike hubs often demand spoke tensions between 90 and 120 kgf. This high tension makes guesswork dangerous.
Let’s look at why visual tools are non-negotiable for this job.
Why You Can’t True an E-Bike Wheel by Feel Alone
You might think spinning the wheel and watching it closely works fine. It doesn’t. Human vision struggles to detect sub-millimeter variances in rotation speed.
On an e-bike, the added weight of the motor creates different stress patterns on the rim compared to acoustic bikes. These stresses hide small bends until they become major failures.
Visual dependency is critical here. A truing stand provides fixed reference points via calipers. Without them, you’re chasing ghosts.
Aggregate reviews report that DIYers who skip stands often overtighten spokes trying to fix phantom wobbles. This leads to cracked rims or stripped nipples.
Consider the difference in diagnostic capability:
| Method | Precision Level | Risk Factor | Best For |
|---|---|---|---|
| Eye/Bare Hand | Low (>2mm error) | High (Over-tensioning) | Rough checks only |
| Bike Frame Calipers | Medium (~1mm error) | Medium (Limited access) | Quick fixes on trail |
| Dedicated Truing Stand | High (<0.5mm error) | Low (Controlled environment) | Proper home maintenance |
As of 2026, most reputable e-bike manuals recommend professional-grade tools for rear wheel adjustments. The complex lacing pattern around hub motors obscures visibility. You simply cannot see the spoke angles clearly while adjusting tension.
Relying on touch feels intuitive but fails mechanically. Spoke tension isn't uniform across the wheel. Feeling one tight spoke doesn't tell you about its neighbor.
Visual gauges reveal the entire profile instantly.
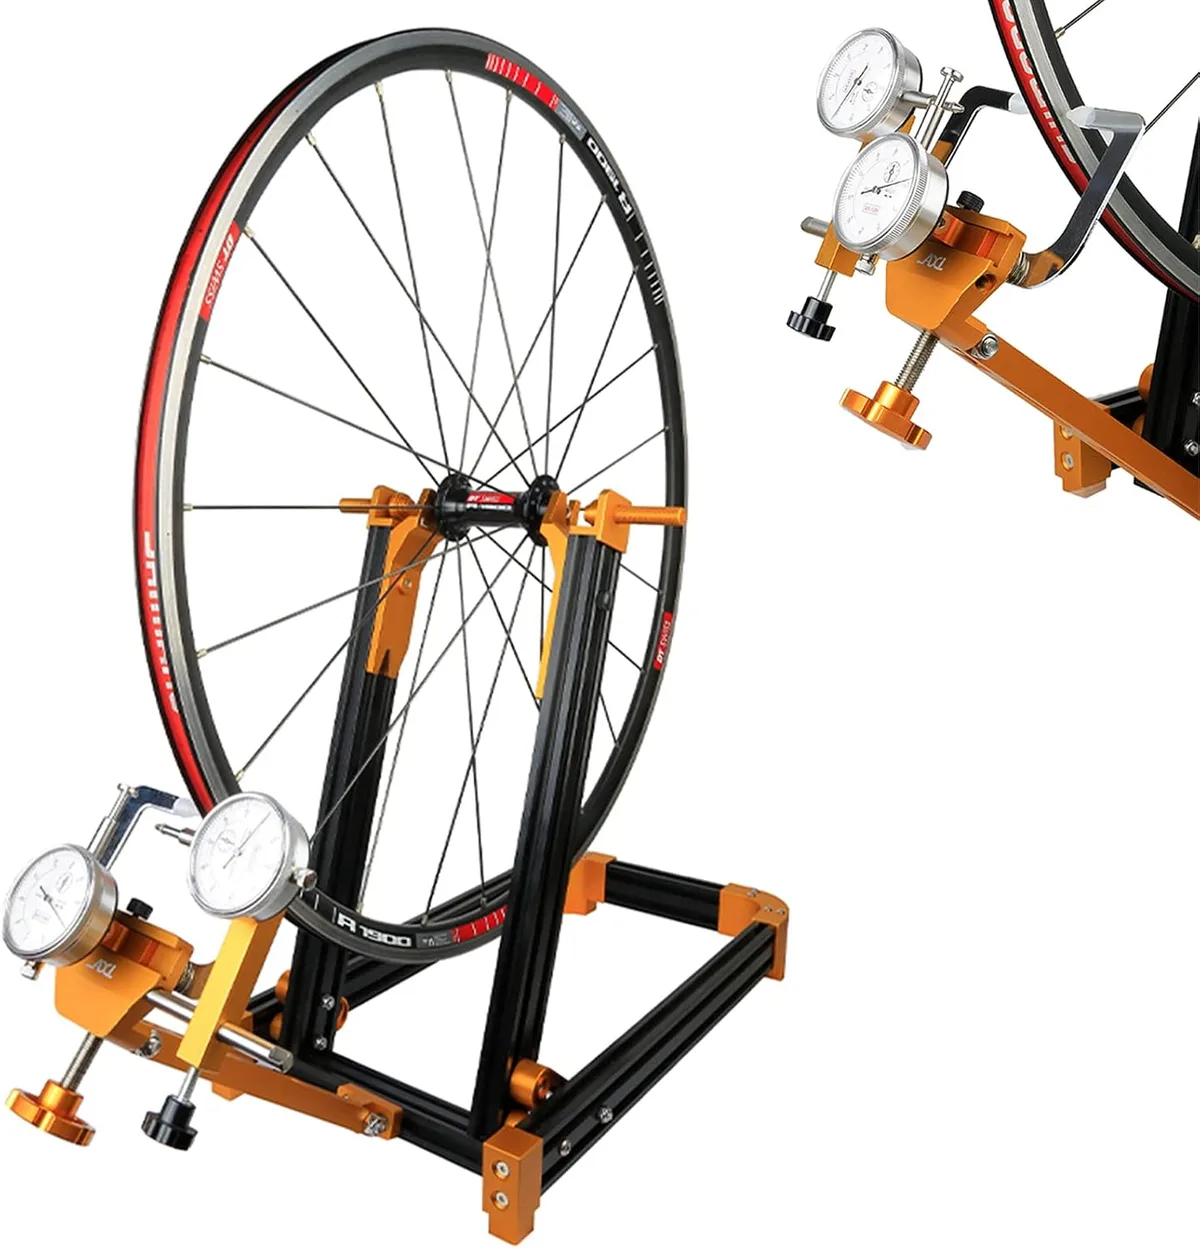
Image source: Web (Bing) / storage.googleapis.com (Web image (fair-use with source credit))
This image illustrates the typical setup where caliper gaps define acceptable tolerance zones. Notice how the indicator arms sit close to the rim surface. That proximity allows detection of minute shifts invisible to the naked eye.
Skipping this step invites premature component failure. Always prioritize visual data over tactile sensation when working under high torque conditions.
Setting Up Your Truing Stand for High-Torque Rims
Proper setup prevents frustration later. Start by mounting the wheel securely in the stand axles. Ensure the quick-release skewer or thru-axle is tightened firmly.
Loose mounting mimics bearing play and ruins your readings. Next, adjust the calipers so they barely miss the rim edge. Aim for a gap no wider than 1 millimeter.
E-bike rear wheels present unique challenges due to cassette interference. The drive side often lacks accessible space for standard wrenches. You may need offset spoke keys or extended drivers.
Check your tool compatibility before starting. If you can’t reach the nipples, you can’t true the wheel.
Focus on identifying the worst deviation first. Spin the wheel slowly. Watch where the rim hits the caliper hardest.
Mark this spot with chalk or tape. This anchor point guides your initial corrections. Ignoring the peak wobble leads to endless adjustment loops.
Remember dish alignment during setup. Dish refers to centering the rim over the hub flanges. Misaligned dishes pull brakes off-center.
Verify both sides of the rim maintain equal distance from the hub locknuts. Use the stand’s secondary calipers if available. If not, measure manually with a ruler.
Consistency matters more than perfection initially. Get close, then refine.
Diagnosing Lateral Wobble vs. Radial Hop with Precision
Lateral wobble moves side-to-side. Radial hop moves up-and-down. Confusing these causes ineffective repairs.
Lateral issues usually stem from uneven spoke tension left-to-right. Radial problems arise from inconsistent top-to-bottom tension. Diagnose correctly before touching any nipple.
Spin the wheel and watch the horizontal caliper. If the rim swings inward, loosen opposing spokes. Tighten the ones pulling against the swing.
For vertical hops, watch the upper/lower calipers. A high spot means tighten nearby spokes. A low spot means loosen them.
Never mix these actions randomly.
Hub motor weight exacerbates radial sag over time. Rear wheels often develop flat spots near the valve hole. Inspect this area specifically.
Per ISO 4210 testing standards, structural integrity relies on balanced load distribution. Uneven tension concentrates stress on specific spokes. This accelerates fatigue cracks.
Use this diagnostic flowchart logic:
- If rim touches side caliper Then address lateral runout.
- If rim lifts away from top caliper Then check radial hop.
- If both occur simultaneously Then fix lateral first, then radial.
Fixing lateral wobble stabilizes the plane of rotation. This makes radial diagnosis easier afterward. Attempting both at once creates chaos.
Patience pays off. Take small turns. Quarter-turns suffice.
Big movements strip threads. Observe changes after each adjustment. Did the gap shrink?
Good. Did it grow elsewhere? Re-evaluate.
Step-by-Step Correction: Loosen Before You Tighten
The golden rule of truing is relieving tension before adding it. Tightening a spoke pulls the rim toward it. But if adjacent spokes are already maxed out, you create stress risers.
Always loosen the opposing spoke slightly before tightening the corrective one. This maintains equilibrium.
Start at your marked worst spot. Identify the three spokes closest to the defect. On the side causing the wobble, loosen those three by 1/8 turn.
On the opposite side, tighten the corresponding three by 1/8 turn. Re-spin the wheel. Measure improvement.
Repeat if necessary.
Accessing drive-side nipples on e-bikes requires care. Cassette teeth block standard wrenches. Use a magnetic holder to catch falling nipples.
Dropping one inside the hub shell is a nightmare to retrieve. Keep magnets handy. Work methodically.
Don’t rush. Rushing strips brass heads.
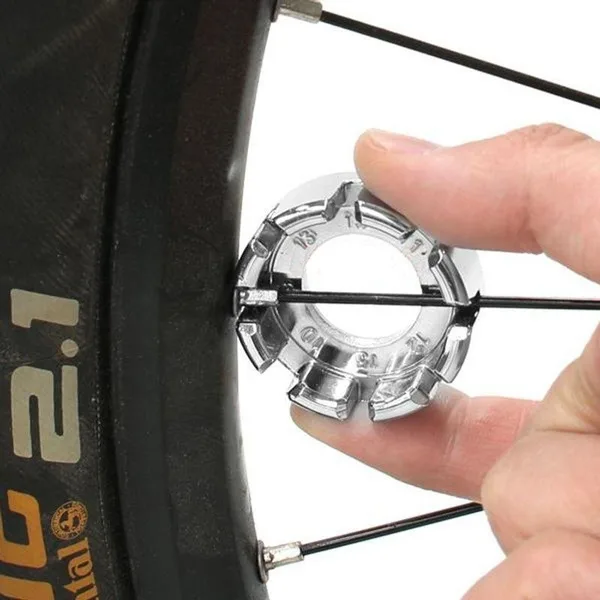
Image source: Web (Bing) / wish.com (Web image (fair-use with source credit))
This photo shows the specific engagement angle needed for recessed nipples. Note the slim profile required to fit between cassette sprockets. Standard thick-bodied keys won’t work here.
Invest in quality, thin-profile drivers designed for modern wheel builds. Cheap tools slip and mar aluminum rims. Protect your investment with precision instruments.
Work around the wheel in segments. Fix the worst zone first. Then move 90 degrees clockwise.
Assess new peaks. Continue until the entire circumference falls within tolerance. This systematic approach ensures no section remains neglected.
Random jumping misses underlying tension imbalances. Stick to the sequence.
Verifying Dish Alignment and Final Tension Balance
Once lateral and radial errors drop below 0.5mm, check the dish. The rim must remain centered over the hub axle. Shifts during truing can pull it off-axis.
Use calipers on both sides of the rim relative to the hub locknut. Equal spacing confirms proper dish.
Adjust dish by tightening all spokes on one side equally. Loosen the other side proportionally. This preserves overall tension while shifting position.
Do this gradually. Large jumps distort roundness again. Re-check lateral/runout after every dish tweak.
They interact constantly.
Final verification involves listening and feeling. Spin the wheel freely. Listen for ticking sounds indicating loose spokes.
Tap each spoke lightly. They should resonate similarly. Dead thuds suggest slack.
High pings imply overtightening. Match tones across the wheel. Uniform sound equals uniform tension.
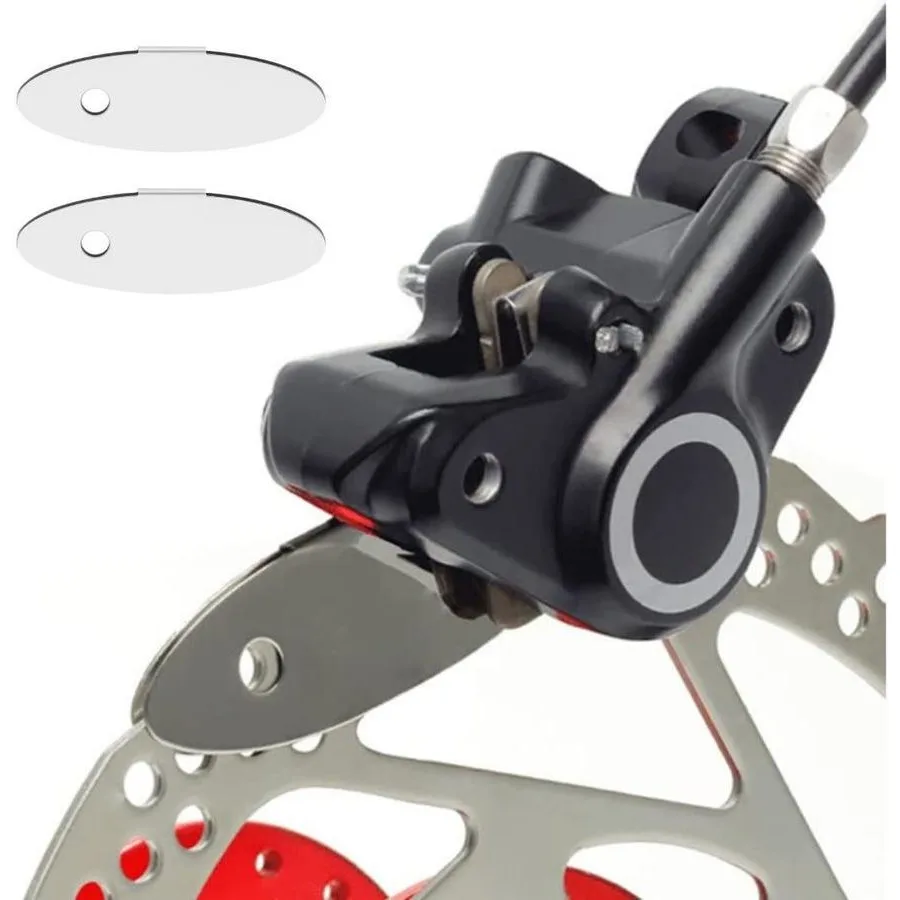
Image source: Web (Bing) / bigw.com.au (Web image (fair-use with source credit))
Here you see the relationship between rim truth and brake performance. Even minor dish errors cause pad drag. Align the rotor parallel to the caliper mounts.
If pads rub despite a true wheel, adjust caliper position. Never bend rotors to compensate for poor truing. That masks deeper mechanical faults.
Address root causes.
Stress relief is the final step. Squeeze paired spokes together firmly by hand. This settles metal components into their natural resting positions.
Unsettled tensions shift during riding. Pre-settling prevents post-installation wobble return. Ride cautiously for the first few miles.
Monitor for changes. Retouch if needed. Done right, your wheel lasts years longer.
Critical Safety Checks for E-Bike Spoke Integrity
Stop immediately if you spot cracks near the nipple beds. Aluminum rims fatigue under high torque, and hairline fractures expand rapidly during riding. A cracked rim is unsafe regardless of how true it looks.
Replace the wheel entirely rather than attempting repair. This prevents catastrophic failure at speed.
Check for stripped threads on brass nipples. If a nipple spins freely without moving the rim, discard it. Mixed materials (steel spokes in aluminum nipples) accelerate galling.
Use anti-seize compound sparingly on new installations only. Never force a stuck nipple. Forcing strips heads or cracks rim walls.
Inspect spoke holes for elongation. Oval-shaped holes indicate excessive stress history. These weak points fail first under load.
Manufacturer specs confirm that deformed hub flanges compromise structural integrity. If your hub shows wear, truing won't fix the root cause. Seek professional assessment for hub-related defects.
Watch for heat spots on the rim surface. Discoloration suggests braking friction exceeded material limits. Heat-treated aluminum loses strength permanently in these zones.
Truing over a heat-spotted rim invites sudden collapse. Avoid applying tension to compromised sections. Prioritize rider safety over cosmetic alignment.
Verify bearing play before trusting any measurement. Worn bearings mimic lateral wobble. Grab the rim and rock it side-to-side.
Any movement means replace bearings first. Truing a wheel with loose hubs wastes time. The deviation returns instantly upon loading.
Fix mechanical looseness before adjusting tension.
Frequently Asked Questions About DIY E-Bike Wheel Truing
Can I true an e-bike wheel without a stand?
Yes, but precision drops significantly. Using brake pads as gauges works for rough corrections. You’ll struggle to detect sub-millimeter deviations accurately.
High-torque e-bike wheels demand tighter tolerances than standard bikes. Expect frequent re-adjustments after rides. Professional shops use tensiometers for exact balance.
Home methods rely on visual estimation. Accept reduced longevity if skipping the stand.
How often should I check my e-bike wheel truth?
Inspect monthly for commuter usage. Heavy off-road riders should check weekly. Post-crash inspections are mandatory immediately.
Look for increased brake rub or handling instability. Aggregate user reviews report faster degradation on hub-motor setups. Vibration loosens spokes over time.
Regular checks prevent minor issues from becoming major failures. Keep a log of adjustments made. Track patterns to identify recurring weak zones.
What happens if I overtighten spokes?
Rim deformation occurs instantly. Aluminum yields under extreme pressure, creating permanent dents. Stripped nipples become impossible to remove.
Cracked spoke holes leak air or seize tubes. Structural weakness spreads to adjacent spokes. Repair costs exceed replacement value quickly.
Always work in small increments. Quarter-turns provide sufficient control. Stop when resistance increases sharply.
Respect material limits to preserve wheel life.
Do front and rear wheels need different techniques?
Front wheels lack cassette interference. Access all nipples easily on both sides. Rear wheels require careful drive-side management.
Motor weight adds asymmetric stress patterns. Dish adjustment matters more on rear assemblies. Front wheels tolerate slight imbalances better.
Rear wheels affect chainline and shifting. Apply stricter tolerance checks to rear builds. Use longer tools for rear access.
Plan workflow around physical constraints.

Similar Posts