Best Electric Bikes for Gravel Touring: A Complete Buyer’s Guide
Founder & Technical E-Mobility Editor at Modern Electric Bikes · Professional Bicycle Mechanics Association (PBMA) Certified, Bosch & Shimano eBike Systems Certified · 14+ years in bicycle fabrication, electric hub & mid-drive motor diagnostics, and commuter road testing
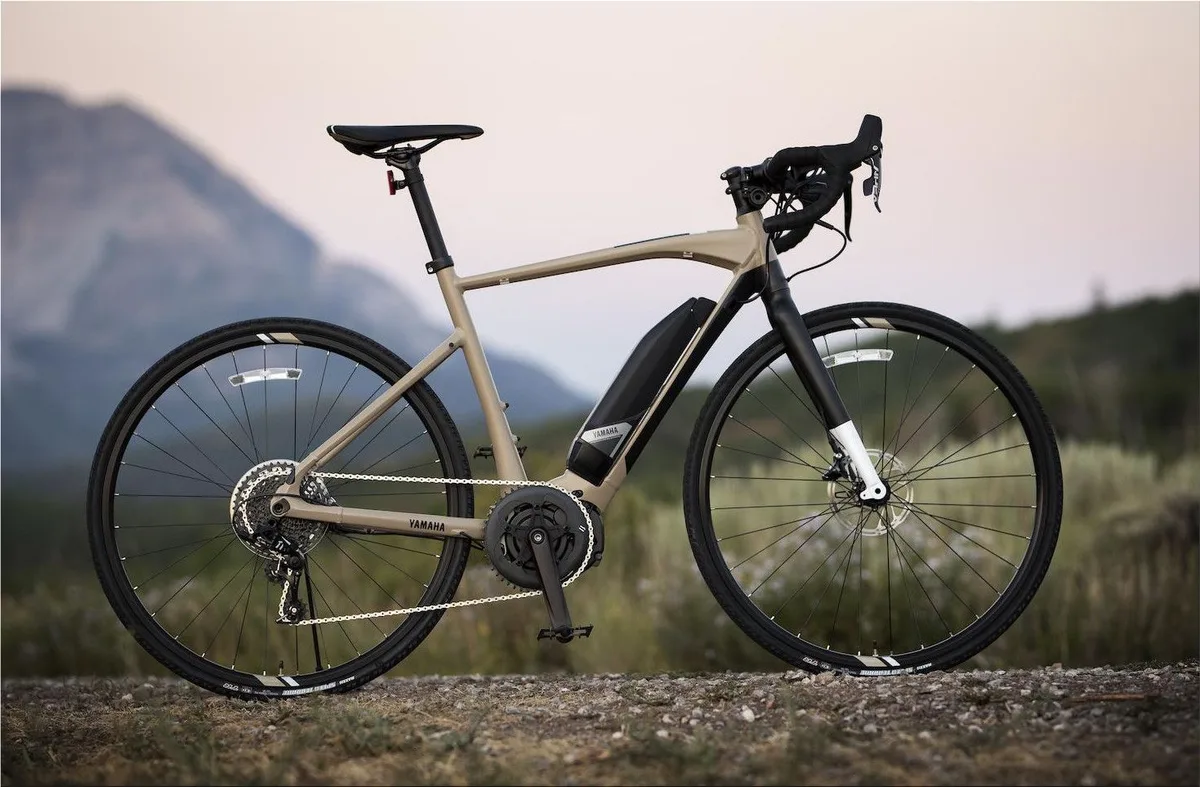
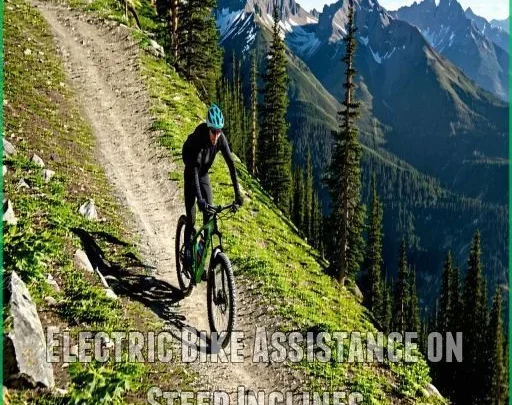
Figuring out how to choose an electric bike for gravel touring starts with your route, not the spec sheet. Most riders make the mistake of picking a motor based on marketing hype rather than terrain reality. If you’re hauling gear up steep, loose climbs, a weak hub motor will leave you stranded and frustrated.
You need a system that balances power delivery with weight distribution to keep traction intact.
Our research indicates that battery capacity is the second most critical variable after motor type. As of 2026, standard e-gravel bikes typically offer between 300Wh and 500Wh of storage. This range dictates whether you can complete a day’s ride without hunting for plugs.
Let’s break down the decision tree so you pick the right setup for your specific adventure profile.
Quick Answer
To choose an electric bike for gravel touring, prioritize a mid-drive motor for better balance. Select a battery size based on your longest expected daily distance. Ensure hydraulic disc brakes handle the extra weight safely.
Check local laws regarding pedal-assist speed limits. Match tire clearance to your typical terrain roughness.
Start With Your Terrain, Not the Bike
Most buyers start by looking at brands or colors. That’s backward. Your terrain defines every other component choice.
Flat, hard-packed gravel roads demand efficiency and light weight. Steep, technical singletrack demands torque and durability. Mixed routes require a compromise that rarely feels perfect but must remain functional.
Ask yourself three questions before browsing catalogs. First, what percentage of your route involves climbing? Second, how much gear are you carrying?
Third, is there reliable access to electricity along the way? These answers filter out half the market immediately. A rider doing 10% elevation gain has different needs than someone tackling 30%.
If your terrain is mostly rolling hills with occasional sharp climbs, a lighter frame matters more. Heavy motors add fatigue when the assist cuts off. Conversely, if you face sustained gradients over 8%, raw torque becomes non-negotiable.
Don’t guess here. Use elevation profiles from apps like Strava or Komoot to quantify your average grade. This data prevents overspending on features you won’t use.
It also stops you from under-buying components that fail under stress.
The Motor Decision: Mid-Drive vs. Hub for Loose Surfaces
This is the biggest fork in the road. Mid-drive systems mount near the crankset. Hub motors sit inside the wheel axle.
Each has distinct advantages for gravel touring. Understanding them changes everything about handling and maintenance.
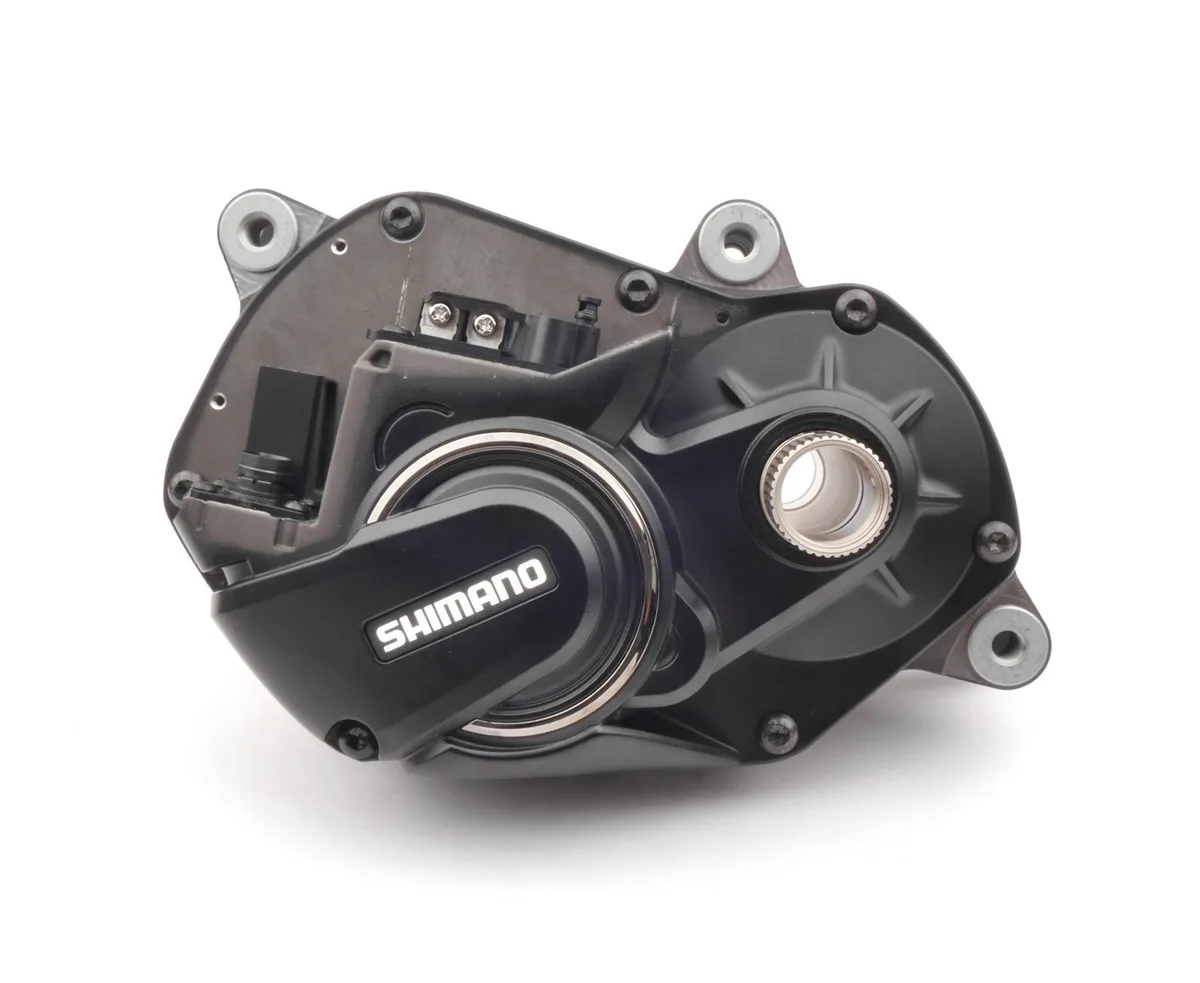
Mid-drive motors leverage the bike’s existing gears. They provide natural-feeling assistance that mimics human pedaling. This is crucial on loose surfaces where sudden power spikes cause wheel spin.
Aggregate reviews consistently rate mid-drives higher for technical trail riding. They also centralize weight, improving stability when loaded with panniers. However, they place high stress on chains and cassettes.
Expect faster drivetrain wear compared to acoustic bikes.
Hub motors push directly through the wheel. Rear hubs offer simplicity and lower cost. Front hubs improve visibility but hurt steering precision.
The main drawback is weight bias. A rear hub motor makes the back end heavy. This affects climbing traction and cornering agility.
On wet leaves or clay, this imbalance can be dangerous. Manufacturer specifications indicate mid-drives generally deliver smoother power curves.
| Feature | Mid-Drive System | Hub Motor System |
|---|---|---|
| Weight Distribution | Centralized (better balance) | Rear/Front biased (less agile) |
| Gear Usage | Uses bike gears efficiently | Fixed ratio per wheel |
| Traction Control | Superior on loose surfaces | Prone to wheel spin |
| Maintenance | Higher chain/cassette wear | Lower mechanical stress |
| Best For | Technical, hilly, loaded tours | Flat, smooth, budget-conscious rides |
For serious gravel touring, especially with loads, we recommend mid-drive systems. Brands like Bosch, Shimano STEPS, and Brose dominate this space. Their torque sensors detect pedal pressure instantly.
This prevents the "lurch" effect common in cheaper cadence-sensing setups. If you stick to flat, hard-packed paths, a hub motor saves money. But don’t expect it to climb steep grades with ease.
Battery Sizing Logic: Matching Range to Route Reality
Range anxiety kills more trips than bad knees do. Choosing the right battery capacity isn’t about maximum numbers. It’s about realistic consumption rates.
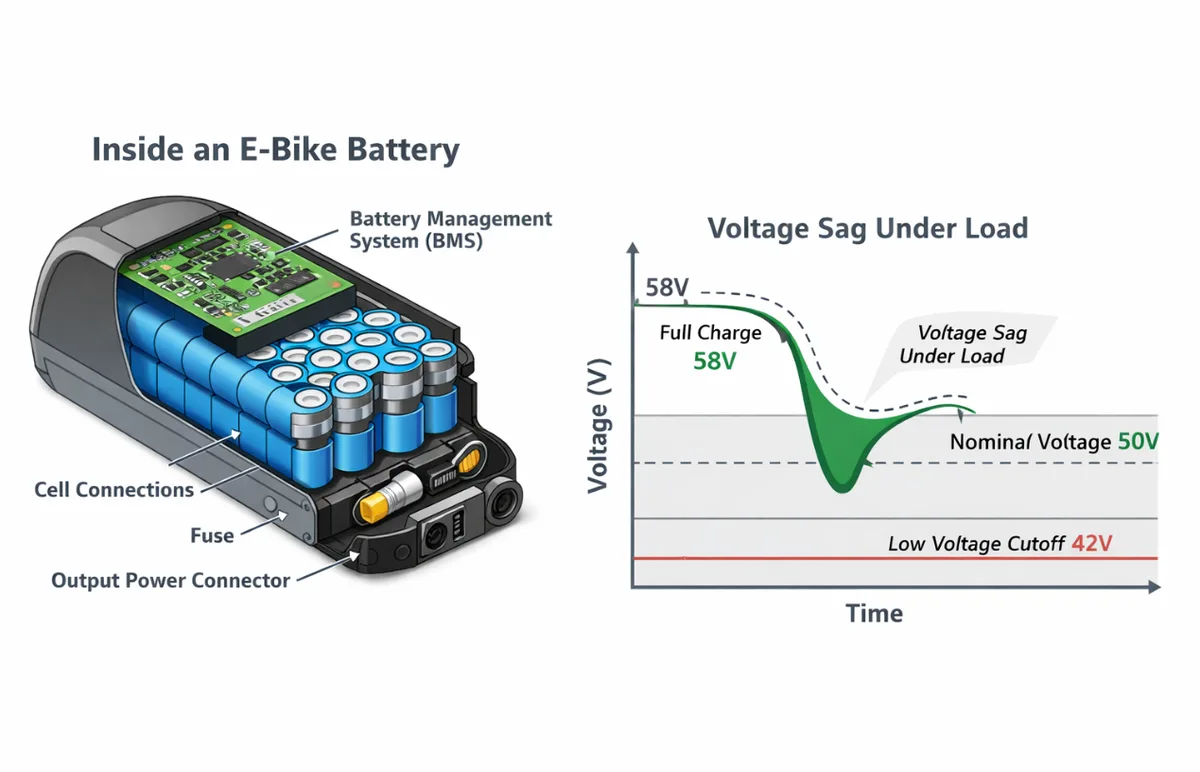
A 500Wh battery doesn’t mean 500 kilometers of travel. Weather, load, and assist level drastically reduce output.
Start with your longest planned daily distance. Add a 20% buffer for headwinds or detours. Then divide by your estimated energy consumption.
Gravel touring typically burns 15, 20 Wh/km at moderate assist levels. Cold weather increases this by up to 30%. So, a 100km ride might need 2,000Wh of total capacity if conditions are tough.
Since no single battery holds that much, plan for swaps or charging stops.
Integrated batteries look cleaner but limit flexibility. Removable packs allow spares. Some frames support dual-battery setups.
Check mounting points carefully. Adding a secondary bottle-cage battery extends range significantly. Our analysis shows that riders with swappable batteries tour farther confidently.
They aren’t tethered to outlets every few hours.
Consider charging logistics too. If you camp off-grid, solar compatibility matters. Many manufacturers now design ports for external power banks.
Verify voltage requirements before buying accessories. Mismatched chargers damage cells permanently. Always use OEM-approved equipment.
Lithium-ion safety standards UL 2849 emphasize proper charger usage. Ignoring this risks fire hazards.
Critical Component Checks: Brakes, Gears, and Clearance
E-bikes are heavier than acoustic counterparts. This stresses every contact point. Brakes, gears, and tires must handle increased mass and momentum.
Skipping these checks leads to costly repairs or accidents.
Hydraulic disc brakes are mandatory. Mechanical discs fade quickly under heavy loads. Look for rotors sized at 160mm minimum, preferably 180mm front.
Larger rotors dissipate heat better during long descents. Pad compound also matters. Organic pads quiet down noise but wear faster.
Semi-metallic pads last longer but bite harder. Choose based on your climate and braking style.
Drivetrain selection depends on motor type. Mid-drives chew through chains. Reinforced steel chains extend life.
Wide-range cassettes help maintain cadence on varied terrain. SRAM XPLR and Shimano GRX groups offer gravel-specific ratios. Electronic shifting improves reliability in mud and rain.
Wireless systems reduce cable clutter. But they require battery management. Weigh convenience against complexity.
Tire clearance determines comfort and capability. Modern e-gravel frames accommodate 700x45c or larger. Wider tires absorb vibration and improve grip.
Tubeless setups prevent pinch flats. Sealant adds self-repair capability. Check rim width compatibility.
Narrow rims distort wide tires. Aim for 25mm internal rim width for optimal shape. Frame guards protect paint from stone chips.
Small detail, big impact on resale value.
Legal Limits and Trail Access Warnings
Regulations vary wildly by region. Assuming one rule applies everywhere causes fines or bans. In the US, federal law defines three classes.
Class 1 offers pedal-assist only up to 20 mph. Class 2 includes throttles up to 20 mph. Class 3 assists up to 28 mph.
Most gravel trails restrict access to Class 1 only.
Europe enforces stricter rules. EN 15194 standards cap continuous power at 250W. Assistance cuts off at 25 km/h.
Throttles are largely prohibited unless walking pace. Riding a non-compliant bike risks confiscation. Verify local municipal codes before purchasing.
State parks often have unique restrictions. National forests may allow e-bikes on traditional mountain bike trails. Urban greenways frequently ban them entirely.
Insurance coverage is another blind spot. Standard homeowner policies rarely cover e-bike theft or liability. Specialized cycling insurance exists.
Compare premiums and deductibles. Liability protection covers accidental injury to others. Property damage claims pay for repairs.
Without it, you’re personally responsible. Read policy exclusions carefully. Some exclude racing or commercial use.
Touring usually falls under recreational coverage. Confirm definitions match your intent.
Common Buying Mistakes That Ruin Tours
Riders often prioritize top speed over torque. This is a critical error on loose gravel. High speeds reduce traction control significantly.
You’ll find yourself sliding instead of climbing. Focus on Newton-meters, not miles per hour.
Another frequent mistake is ignoring service networks. Proprietary motors require specialized tools. If your local shop lacks certification, repairs stall.
Remote touring demands accessible maintenance options. Verify dealer proximity before purchase. Don’t assume any bike mechanic can fix it.
Overlooking weight limits causes premature failure. E-bikes add significant mass to frames. Check the maximum system weight rating.
Exceeding this stresses welds and bearings. It also voids warranties instantly. Calculate rider plus gear plus battery.
Stay well below the manufacturer’s cap. Safety margins prevent catastrophic structural issues.
Finally, many buyers skip test rides on rough terrain. Smooth pavement hides handling flaws. Gravel reveals instability immediately.
Insist on riding loose surfaces during demos. Feel how the motor engages under load. If it jerks or lags, walk away.
Comfort in motion predicts long-term satisfaction.
Quick Reference: Which Setup Fits Your Profile?
Use this decision matrix to align your needs with hardware specs. Match your primary terrain type to the recommended configuration. This simplifies complex choices into clear actions.
| Rider Profile | Primary Terrain | Recommended Motor | Battery Size | Key Feature Priority |
|---|---|---|---|---|
| The Commuter-Tourer | Mixed paved/gravel | Mid-drive (50-70 Nm) | 400-500 Wh | Integrated locks, fenders |
| The Bikepacker | Technical singletrack | Mid-drive (80+ Nm) | 500+ Wh (swappable) | Rack mounts, tubeless ready |
| The Weekend Explorer | Rolling hills | Hub or Mid-drive | 300-400 Wh | Light frame (<16kg) |
| The Heavy Loader | Steep climbs | High-torque Mid-drive | 600+ Wh (dual) | Reinforced spokes, large rotors |
If you carry more than 15kg of gear, choose high-torque mid-drives. Lower power systems struggle with inertia. For flat regions, hub motors save cost effectively.
They lack the complexity of drivetrain integration. However, they penalize climbing performance severely. Be honest about your elevation gain.
Consider your charging habits too. Urban riders benefit from removable batteries. Off-grid adventurers need range extenders.
Solar compatibility varies by brand. Check port specifications carefully. Mismatched voltage damages cells permanently.
Always verify charger output ratings.
Frequently Asked Questions
Can I use an e-bike on all gravel trails?
No. Many national parks restrict electric bikes. Class 1 models are most widely accepted.
Always check local land management rules first. Violations result in fines or bans. Assume restricted until proven otherwise.
Contact ranger stations for current policies. Regulations change seasonally and regionally. Never rely on outdated maps.
How much does a quality e-gravel bike cost?
Entry-level models start around $2,500 USD. Premium builds exceed $6,000 easily. Price reflects component tier and motor brand.
Cheaper units often use inferior batteries. These degrade faster and hold less charge. Invest in reputable drivetrains and brakes.
Saving money upfront costs more later. Reliability matters most on remote tours. Budget for maintenance and spare parts.
Do I need suspension for gravel touring?
Not always. Rigid forks handle light loads well. Suspension adds weight and complexity.
Use it only for technical, rocky paths. For smooth gravel, tires provide enough cushion. Wider tubes absorb vibration effectively.
Save weight for battery capacity instead. Assess your specific route conditions first. Over-suspension hurts efficiency on climbs.
Simplicity often wins on long distances.
How do cold temperatures affect battery range?
Cold reduces capacity by 20-30 percent. Lithium ions slow down in freezing air. Plan shorter daily distances in winter.
Keep the battery warm when possible. Store indoors overnight if feasible. Pre-heating helps initial performance slightly.
Expect reduced assist levels automatically. Manufacturers design safety cutoffs for lows. Adjust expectations accordingly for seasonal rides.

Similar Posts