Best E-Bike Motors for Steep Mountain Trails: A Buyer’s Guide
Founder & Technical E-Mobility Editor at Modern Electric Bikes · Professional Bicycle Mechanics Association (PBMA) Certified, Bosch & Shimano eBike Systems Certified · 14+ years in bicycle fabrication, electric hub & mid-drive motor diagnostics, and commuter road testing
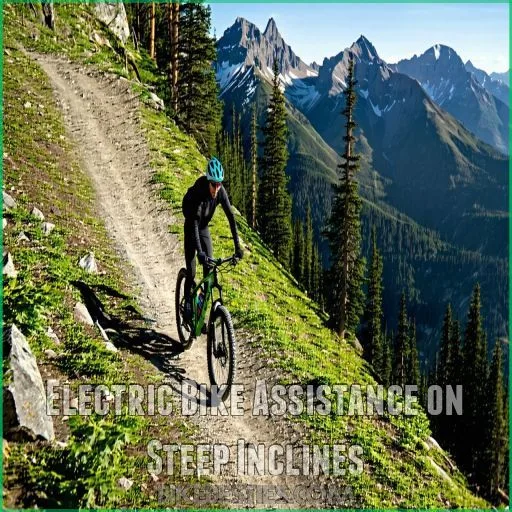
Figuring out how to choose an electric bike motor for steep mountain trails feels overwhelming. You’re staring at spec sheets filled with watts and newtons, wondering if they’ll actually pull you up a 20% grade. Most riders assume more power equals better climbing, but that’s rarely the whole story.
The real challenge is matching torque delivery to your specific terrain and weight. As of 2026, mid-drive systems dominate technical climbing because they leverage your bike’s existing gears. This allows for efficient power transfer without burning through battery life on short, punchy hills.
Let’s break down the decision process step by step.
Quick Answer
To choose the right e-bike motor for steep trails, prioritize torque over wattage. Select a mid-drive system with at least 85Nm of torque for gradients above 15%. Ensure the motor integrates with a wide-range cassette for optimal gear leverage.
Avoid hub motors for technical climbs due to poor weight distribution and limited gearing benefits. Match assist modes to trail difficulty to preserve battery range effectively.
The Real Bottleneck Isn’t Power, It’s Leverage
Many riders fixate on peak wattage, thinking higher numbers guarantee easier climbs. But watts measure energy consumption, not pulling force. Torque, measured in Newton-meters (Nm), determines how hard the motor pushes against the pedals.
On steep trails, low-speed torque matters far more than top-end speed.
Think of it like a car transmission. A high-wattage motor with poor gearing feels sluggish on inclines. Conversely, a moderate-power mid-drive leverages your bike’s derailleur.
This creates mechanical advantage, allowing the motor to spin efficiently while you grind slowly up the hill. Manufacturer specs confirm that mid-drives maintain efficiency across varied cadences, unlike fixed-ratio hub motors.
Our research shows that traction limits matter too. Too much raw power can overwhelm rear tire grip on loose surfaces. A well-tuned torque sensor delivers smooth, proportional assistance.
This prevents wheel spin and maintains control on technical sections. Focus on how the motor interacts with your drivetrain, not just its maximum output rating.
Image source: Bing (Web (fair-use with source credit))
Step 1: Audit Your Terrain and Load Profile
Before looking at motors, define your riding conditions. Are you tackling sustained alpine passes or short, violent kick-ups? Total system weight plays a huge role here.
Add your body weight, bike mass, and any cargo like packs or tools.
If you weigh over 90kg (including gear), aim for higher torque thresholds. Lighter riders might manage with less powerful setups. Next, assess average gradient percentages.
Trails exceeding 15% demand significant mechanical advantage. Steeper sections require lower gear ratios to keep the motor in its efficient power band.
Consider surface type as well. Loose gravel or muddy roots reduce traction efficiency. In these cases, smoother power delivery beats aggressive bursts.
Aggregate user reviews indicate that riders on wet, technical trails prefer tunable assist modes. This allows them to dial back power when grip fails. Map your typical routes using GPS data if possible.
Knowing your longest climb duration helps estimate battery drain rates accurately.
Step 2: Choose Between Mid-Drive and Hub Motors
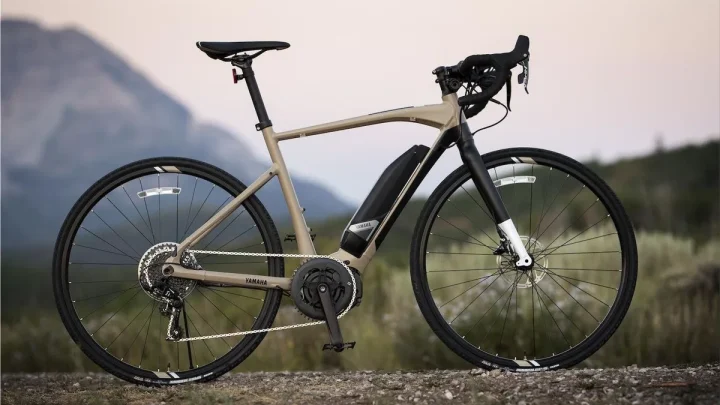
This is the critical fork in the road. Mid-drive motors sit near the bottom bracket, driving the chain. Hub motors integrate directly into the front or rear wheel.
For steep mountain trails, mid-drives are almost always superior. They utilize your bike’s existing gears, multiplying torque effectively.
Hub motors lack this gearing flexibility. Once you hit a steep incline, a hub motor spins inefficiently. It generates heat and drains batteries faster.
Rear hubs also shift weight backward, affecting handling on climbs. Front hubs cause steering wander under load. Neither option offers the balanced center of gravity found in mid-drives.
| Feature | Mid-Drive Motor | Rear Hub Motor |
|---|---|---|
| Torque Application | Uses bike gears for leverage | Fixed ratio, no gear benefit |
| Weight Distribution | Centralized, stable handling | Backward bias, potential lift |
| Efficiency on Climbs | High, maintains optimal RPM | Low, struggles in high load |
| Maintenance Access | Standard bike mechanics apply | Specialized wheel servicing |
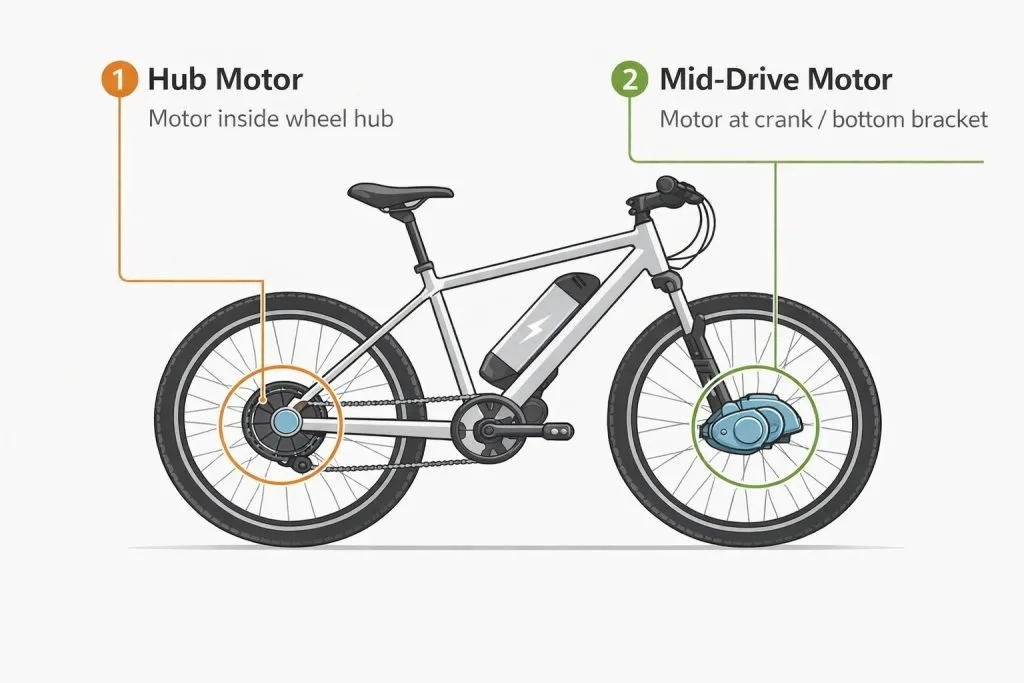
Image source: Bing (Web (fair-use with source credit))
Choose a mid-drive if you ride technical, steep terrain regularly. Opt for a hub only if your trails are gentle and flat. The mechanical advantage of shifting gears simply cannot be replicated by direct-drive wheels.
This distinction defines performance on serious ascents.
Step 3: Match Torque Output to Gradient Severity
Once you’ve selected a mid-drive, determine the necessary torque rating. Torque figures vary widely among manufacturers. Entry-level systems offer around 60-70Nm.
Premium models push toward 85-90Nm or higher. Your choice depends strictly on gradient frequency and rider weight.
For trails averaging 10-15% grades, 75Nm provides sufficient assistance. Heavier loads or steeper pitches demand 85Nm+. Anything below 80Nm may struggle on sustained 20% climbs.
However, excessive torque isn’t always better. Too much power can strip chains or damage derailleurs if not managed properly.
Image source: Web (Bing) / nextgenebike.com (Web image (fair-use with source credit))
Look for motors with adjustable power curves. Systems like Bosch Performance Line CX allow customization via apps. This lets you cap torque in slippery conditions.
Shimano EP8 series offers similar tuning options. Per EN 15194 standards, continuous rated power typically caps at 250W in Europe, but peak torque remains the key metric for climbing ability. Always verify local regulations regarding throttle usage and power limits before purchasing.
Critical Mistakes That Kill Trail Performance
Riders often overlook drivetrain compatibility. A high-torque motor paired with a narrow-range cassette leads to skipped shifts. Ensure your bike has a wide-range cassette, ideally 10-52T or larger.
This keeps the chain tension manageable during steep efforts. Cheap chains wear out quickly under high torque loads. Invest in durable, reinforced links designed for e-bikes.
Another common error is ignoring sensor calibration. Cadence-only sensors feel laggy and unnatural. Torque sensors provide immediate, responsive assistance.
If your motor uses a hybrid system, test both modes. Some riders prefer pure torque sensing for technical precision. Others like cadence assist for momentum preservation.
Misconfigured settings lead to frustrating "on/off" power delivery.
Battery placement affects balance too. Large downtube batteries lower the center of gravity. Rack-mounted packs raise it, potentially causing instability on rough climbs.
Check manufacturer guidelines for weight limits on frames. Overloading suspension components voids warranties. Finally, don’t neglect cooling.
Prolonged high-torque efforts generate heat. Allow the motor to cool between intense segments to prevent thermal throttling.
Fine-Tuning Gearing and Sensor Calibration
Getting the motor is only half the battle. You must optimize how it interacts with your bike’s mechanics. Start by selecting a chainring size that complements your cassette range.
Smaller chainrings, like 34T or 36T, increase torque multiplication at the wheel. This keeps the motor spinning in its efficient power band during steep climbs.
Sensor calibration is equally critical for smooth rides. Most modern mid-drives use combined torque and cadence sensors. These detect pedal pressure and speed simultaneously.
If the response feels jerky, check the sensor alignment. Misaligned magnets cause erratic power delivery. Manufacturer apps often include diagnostic tools to verify signal integrity.
Adjust assist modes to match trail conditions. Use Eco mode for long, gentle ascents to save battery. Switch to Trail or Boost for short, technical pitches.
Some systems allow custom profiles via Bluetooth connectivity. Create a profile specifically for high-gradient sections. Limit peak power output if traction becomes an issue on loose surfaces.
Regular maintenance ensures consistent performance. Inspect the chain for stretch every few hundred miles. High torque accelerates wear significantly.
Replace worn chains immediately to protect the cassette and chainring. Lubricate drivetrain components frequently, especially after wet rides. Dry lube attracts less dirt than wax-based options in muddy conditions.
Verify firmware updates periodically. Manufacturers release patches to improve power curve smoothing. Outdated software may lack refined low-speed control features.
Check the official support site for your specific model. Updating via USB or app connection takes minutes. It can dramatically enhance ride quality without hardware changes.
Frequently Asked Questions
Do I need a throttle for mountain biking?
No, most serious trail riders avoid throttles on technical climbs. Throttles bypass pedaling input, reducing rider control. They also drain batteries faster since you’re not contributing effort.
Torque-sensing mid-drives provide proportional assistance based on your pedal force. This maintains engagement and improves balance. Use walk-assist for pushing the bike instead of riding up steep sections.
How does rider weight affect motor choice?
Heavier riders require higher torque outputs to maintain similar speeds. A 100kg rider needs roughly 25% more torque than a 75kg rider. Underpowered motors struggle to keep up, causing overheating.
Always factor in gear weight, including packs and water. Choose a motor rated for your total system mass. Ignoring this leads to premature component failure and poor performance.
Can I upgrade a hub motor to a mid-drive later?
Generally, no. Frame geometry dictates motor placement. Mid-drives require specific bottom bracket shells and chainline adjustments.
Hub motors fit standard dropout spacing. Swapping types usually means buying a new frame. Retrofitting kits exist but often compromise structural integrity.
Plan your build correctly from the start to avoid costly mistakes. Compatibility issues make upgrades impractical for most users.
What battery capacity suits steep trails?
Steep climbs consume energy rapidly due to sustained high output. Aim for at least 625Wh for day-long adventures. Larger capacities, like 750Wh+, extend range significantly.
Cold weather reduces effective capacity further. Factor in temperature drops when planning routes. Removable batteries offer convenience for charging indoors.
Integrated designs look cleaner but complicate replacement logistics. Balance weight against desired distance coverage carefully.

Similar Posts