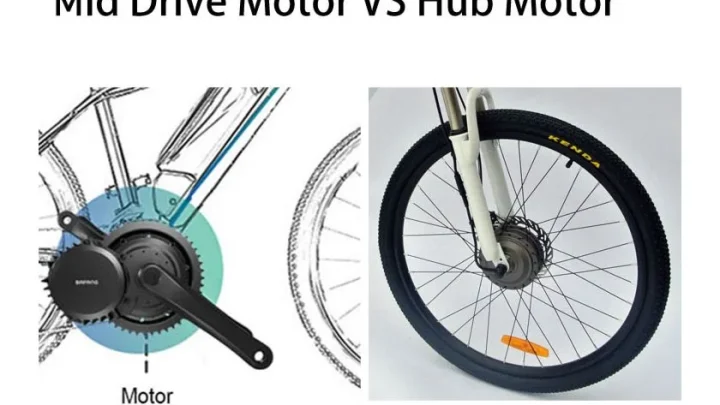
How to Install a Rear Hub Motor on Your Bike
Founder & Technical E-Mobility Editor at Modern Electric Bikes · Professional Bicycle Mechanics Association (PBMA) Certified, Bosch & Shimano eBike Systems Certified · 14+ years in bicycle fabrication, electric hub & mid-drive motor diagnostics, and commuter road testing
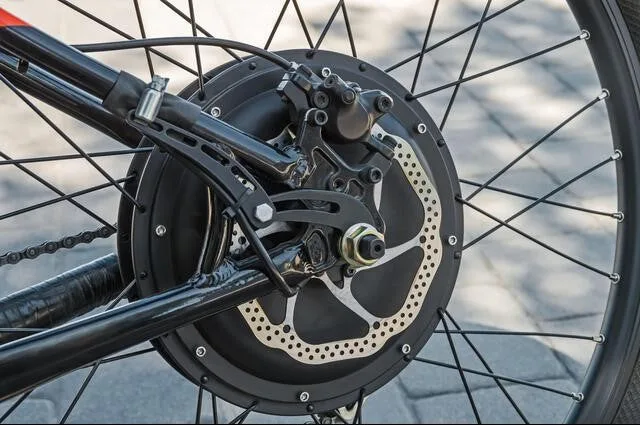
Learning how to install a rear hub motor on a bicycle sounds straightforward until you realize the geometry matters. You aren't just swapping wheels. You're integrating heavy electrical components into a frame designed for human power alone.
Most guides skip the visual nuances that make or break the build. We've found that text instructions often miss critical spatial details like dropout clearance and cable routing paths. Getting these right prevents damage to your frame and ensures safe operation.
The stakes are higher than they seem. A loose torque arm can bend dropouts instantly under load. Per ISO 4210 safety standards, structural integrity is non-negotiable for modified cycles.
Let's look at why seeing the parts in place beats reading about them.
Image source: Web (Bing) / chamrider.com (Web image (fair-use with source credit))
Why You Can’t Install a Rear Hub Motor Without Seeing It
Text descriptions fail when dealing with three-dimensional fitment issues. You need to visualize how the motor shell interacts with your chainstays. A diagram shows ideal conditions, but real bikes have unique quirks.
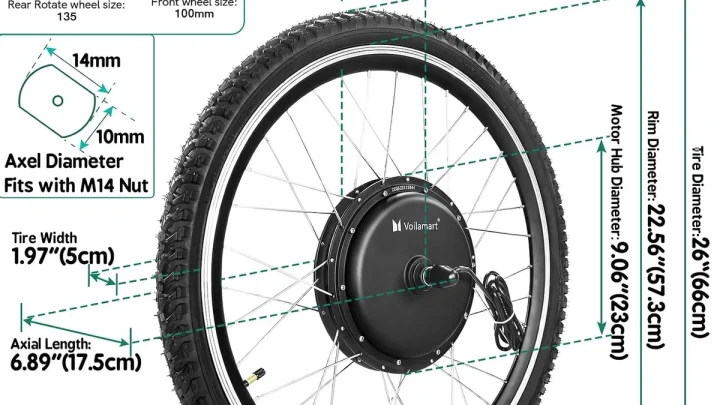
Consider tire clearance. Many rear hub motors widen the axle significantly. If you don't see the gap between the tire sidewall and the frame, you risk rubbing.
This isn't just annoying; it wears out tires and can lock the wheel during rides.
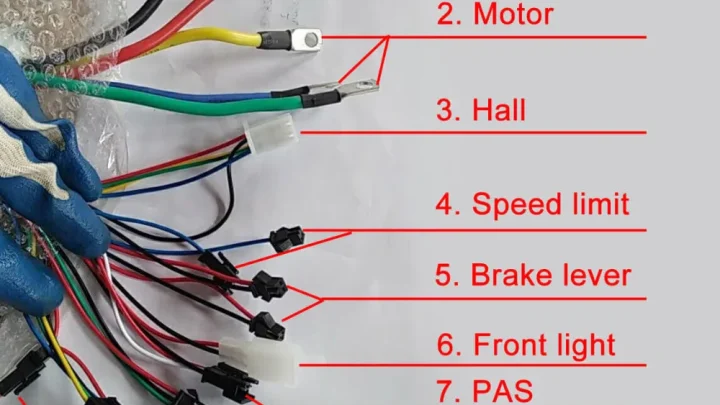
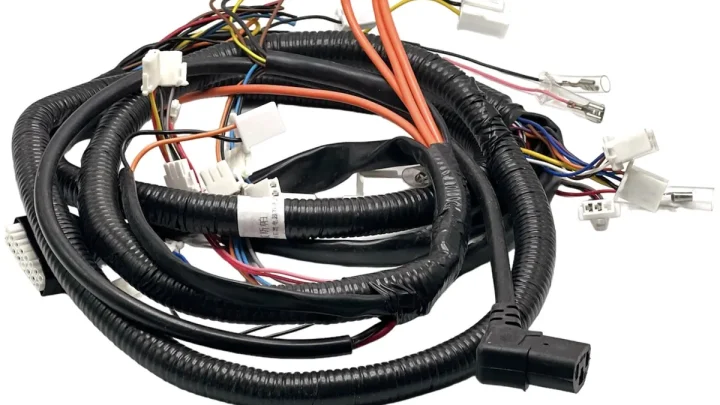
Cable management is another blind spot. Wires must route cleanly from the hub to the controller. Poor routing leads to chafing against metal edges.
Over time, this exposes live wires. Visual inspection helps you identify pinch points before they become hazards.
Torque arm alignment requires precision. The arm connects the motor housing to the frame. If it’s angled incorrectly, it puts stress on the bolts rather than transferring force efficiently.
Photos reveal proper angles better than words ever could.
Finally, weight distribution changes handling dynamics. Seeing where the battery sits relative to the center of gravity helps you anticipate balance shifts. This awareness prepares you for test rides without unexpected wobbles.
Pre-Flight Check: Dropouts, Clearance, and Frame Compatibility
Before touching a wrench, verify your frame can handle the conversion. Not all bicycles suit rear hub motors. Carbon fiber frames generally lack the durability for high-torque applications unless specifically engineered for it.
Start with dropout type. Horizontal dropouts allow for easier adjustment of chain tension and axle position. Vertical dropouts are fixed.
With vertical slots, you must match the motor axle width exactly to the frame spacing. Measure carefully. Standard road bikes use 130mm rear spacing.
Mountain bikes vary widely, often 135mm, 142mm, or 148mm boost.
Check for disc brake interference. If your bike has post-mount or flat-mount calipers, ensure the motor hub doesn't collide with the rotor or caliper body. Some hubs require specific adapter brackets.
Missing this step means you cannot mount the wheel properly.
Tire clearance remains the most common dealbreaker. Remove your current wheel. Place the new motor hub in the dropouts (without lacing).
Spin it slowly. Watch for contact with the seat stays or chain stays. Even a millimeter of rub is unacceptable.
Frame material matters too. Aluminum handles vibration well. Steel is forgiving but heavy.
Titanium is strong but expensive to repair if damaged. Avoid converting cheap department store bikes. Their welds may not withstand added stress.
Look for robust construction with reinforced dropouts if possible.
| Component | Ideal Spec | Risk Factor |
|---|---|---|
| Dropout Type | Horizontal or Slotted | Fixed vertical limits adjustability |
| Axle Width | Matches frame exactly | Mismatch causes binding or play |
| Brake Mount | Disc-compatible hub | Rotor collision prevents mounting |
| Tire Gap | >5mm clearance | Rubbing damages tire/frame |
The Visual Blueprint: Torque Arms, Cables, and Controller Placement
Understanding component interaction is key. The torque arm acts as an anti-rotation device. When the motor spins the wheel forward, the housing tries to spin backward.
The torque arm anchors the housing to the frame, preventing this rotation.
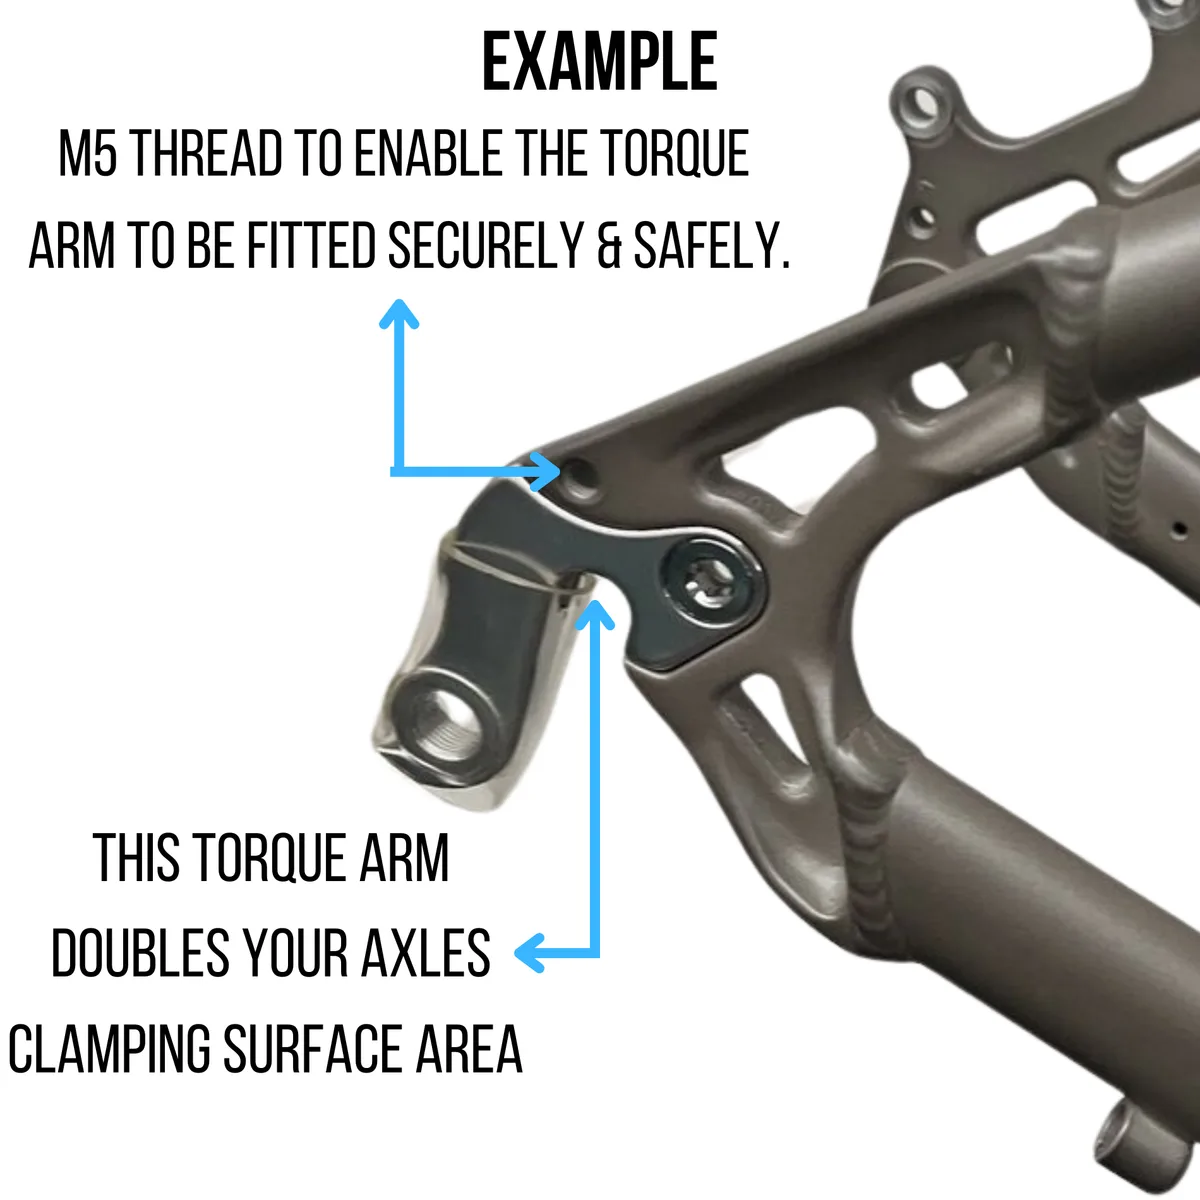
Placement varies by design. Some arms bolt directly to the dropout. Others clamp onto the chainstay.
Clamps distribute force over a larger area, reducing stress concentrations. Always use thread-locker on bolts. Vibration loosens fasteners quickly.
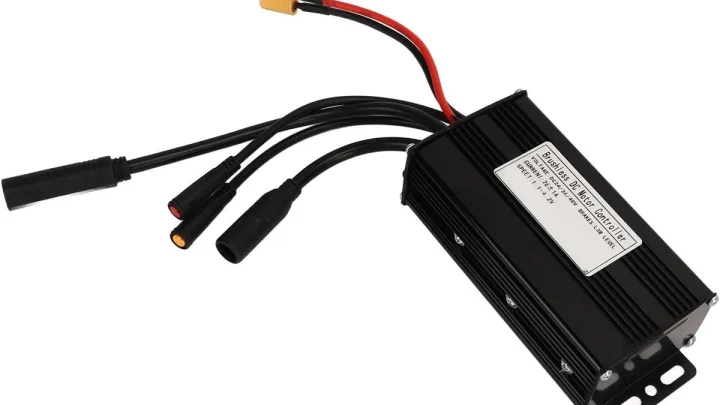
Controller placement dictates cable length. Mount the controller near the battery for shortest power cables. Position it away from water ingress points.
Zip ties secure bundles, but avoid tight cinching that crushes insulation. Leave slack for suspension movement if applicable.
Battery mounting affects balance. Rack-mounted batteries raise the center of gravity. Down tube mounts keep weight low and central.
Choose based on your frame geometry and riding style. Ensure the battery lock mechanism engages fully. Loose batteries rattle and disconnect mid-ride.
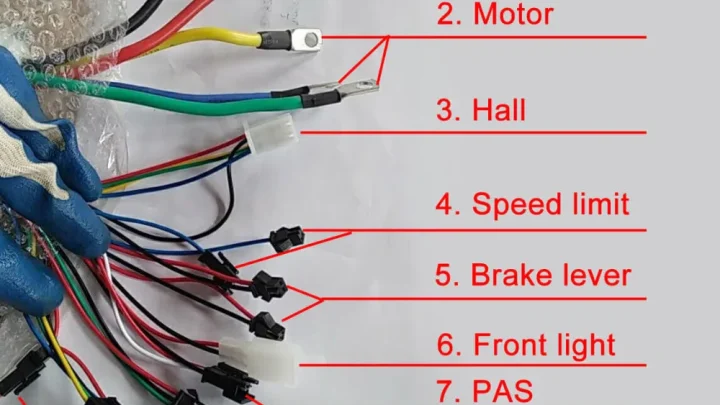
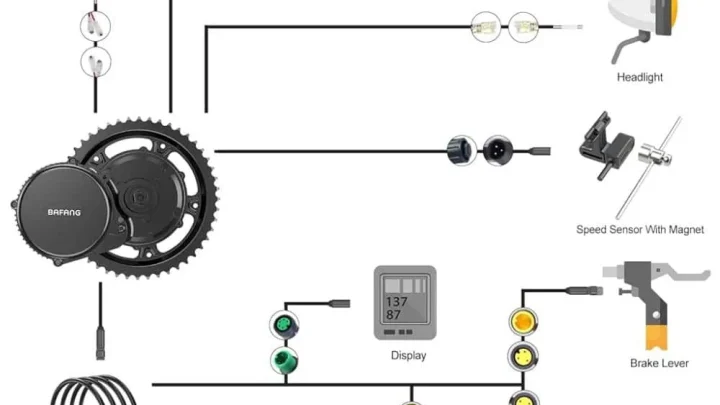
Visualize the path from hub connector to controller input. Phase wires carry high current. Keep them separated from signal wires like throttle or sensor inputs.
Interference causes erratic behavior. Use conduit or split loom tubing for protection.
Label connectors early. Mistaking phase wires for hall sensor plugs fries controllers instantly. Most kits color-code these, but verify with multimeter continuity tests if unsure.
Never guess with electricity.
Step-by-Step Assembly: From Unboxing to First Spin
Assembly follows a strict sequence. Skipping steps creates rework. Begin by removing the old rear wheel.
Disconnect brakes if necessary. Slide the wheel out horizontally. Clean the dropouts thoroughly.
Debris prevents flush seating.
Next, prepare the new wheel. Most hub motors come unlaced. You must lace spokes into the rim.
Use a spoke pattern recommended by the manufacturer. Cross-lacing provides strength for high torque. Radial lacing saves weight but risks spoke fatigue under load.
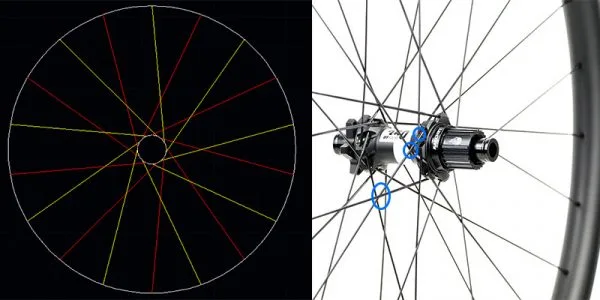
True the wheel before installation. A wobbling wheel binds in dropouts. Adjust nipple tension evenly.
Check runout with a dial indicator or marker pen. Precision here saves headaches later.
Install the motor into the frame. Align axles with dropout slots. Secure with appropriate nuts or quick-release skewers.
Tighten gradually. Alternate sides to pull the axle straight. Uneven tightening bends axles or cracks dropouts.
Attach the torque arm. Bolt it to the designated anchor point. Ensure it sits flush against the frame.
Do not force it. Misalignment stresses bolts. Use washers to spread load.
Apply torque spec strictly. Under-tightening slips. Over-tightening strips threads.
Route cables next. Connect phase wires to the controller. Plug in hall sensors.
Attach throttle or PAS sensor. Secure all connections with dielectric grease to prevent corrosion. Test continuity before powering up.
Mount the battery. Engage locks firmly. Connect main power lead last.
Double-check polarity. Reverse polarity destroys electronics instantly. Verify no pinched wires exist between moving parts.
Spin the wheel by hand. Listen for grinding. Feel for resistance.
If smooth, proceed to electrical test. Turn on the system briefly. Confirm motor hums correctly.
Shut down immediately if noise seems abnormal.
The "Looks Right But Isn't" Mistakes That Kill Builds
Several errors appear minor but cause major failures. Ignoring spoke tension uniformity leads to broken spokes. High torque amplifies small imbalances.
One loose spoke transfers load to neighbors. They snap sequentially.
Overlooking thermal expansion is dangerous. Motors heat up during extended climbs. Metal expands.
Tight fits become binding fits. Allow slight tolerance in axle seating. Don't jam components together cold.
Neglecting waterproofing invites failure. Rain enters connector housings. Corrosion builds rapidly.
Seal every joint with silicone gel or heat shrink. IPX ratings assume perfect seals. Real-world abuse demands extra care.
Misjudging gear ratios hurts efficiency. Small sprockets increase RPM but reduce torque multiplication. Large cogs ease strain on the motor.
Match gearing to terrain. Flatlands favor smaller gears. Hills demand larger ones.
Forgetting brake cut-off switches compromises safety. Systems must halt motor output when brakes engage. Bypassing this feature violates legal codes in many regions.
It also removes a critical safety layer. Always wire cut-offs correctly.
Underestimating frame flex reduces longevity. Heavy motors induce torsional stress. Frames twist slightly under load.
Repeated twisting fatigues metal. Reinforce weak areas with gussets if needed. Monitor for cracks regularly.
Ignoring firmware settings limits performance. Controllers often ship with conservative defaults. Unlocking speed or power requires configuration tools.
However, exceeding legal limits voids warranties and breaks laws. Adjust within compliant boundaries only.
Skipping pre-ride inspections risks accidents. Bolts loosen after initial vibrations. Check torque after first 10 miles.
Inspect cables for wear. Verify tire pressure. Negligence turns mechanical issues into crashes.
Safety Specs and Legal Limits for Your New E-Bike
Legal compliance isn't optional. It determines where you can ride. In the US, federal law caps motors at 750 watts.
Top speed must not exceed 20 mph on throttle alone. Pedal-assist systems can go up to 28 mph. Exceeding these limits reclassifies your bike as a moped or motorcycle.
That means registration, insurance, and license requirements kick in.
Europe enforces stricter rules. The EU standard limits continuous rated power to 250 watts. Assist cuts off completely at 25 km/h (about 15.5 mph).
Throttle-only operation is generally prohibited unless limited to walking pace (6 km/h). Ignoring this voids CE marking validity. You risk fines or confiscation if stopped by police.
Safety standards like UL 2849 cover electrical systems. This certification ensures batteries and controllers meet fire resistance criteria. Non-certified kits pose higher risks of thermal runaway.
Always check for the UL mark on battery packs. Cheap, uncertified lithium cells are common failure points. They can catch fire during charging or impact.
Brake performance must match increased speeds. Stock mechanical discs often struggle with e-bike momentum. Hydraulic brakes provide better modulation and stopping power.
Upgrade them if you haven’t already. Also, ensure your lights are bright enough for night visibility. Faster bikes need faster reaction times from drivers around you.
Wear a helmet rated for high-speed cycling. Standard road helmets may not offer adequate protection at 28 mph. Consider MIPS-equipped models for rotational impact safety.
Maintenance and Troubleshooting After the Build
Regular upkeep extends component life. Check torque arm bolts monthly. Vibration loosens fasteners over time.
Use a torque wrench to retighten to spec. Inspect cable insulation for cracks or chafing. Replace damaged wires immediately to prevent shorts.
Keep connectors clean and dry. Dielectric grease helps repel moisture and corrosion.
Monitor battery health closely. Li-ion cells degrade with age and heat. Store batteries at 40-60% charge if unused for long periods.
Avoid leaving them plugged in overnight unnecessarily. Temperature extremes harm capacity. Charge indoors at room temperature whenever possible.
Never charge swollen or hot batteries. Dispose of them properly at recycling centers.
Troubleshoot common issues systematically. If the motor doesn’t spin, check brake cut-off switches first. These sensors often trigger falsely due to misalignment.
Adjust the magnet position until the light turns off. Next, verify phase wire connections. Loose plugs cause jerky movement or error codes.
Consult your controller manual for specific fault indicators.
Unusual noises signal mechanical problems. Grinding suggests bearing wear inside the hub. Clicking might indicate loose spokes or chain rub.
Address these promptly to avoid further damage. Lubricate the chain regularly. Electric drivetrains put extra stress on chains.
Use a high-quality synthetic lubricant. Clean cassette teeth to prevent skipping under load. Regular maintenance keeps your conversion reliable and safe for daily commutes.
Frequently Asked Questions
Can I install a rear hub motor on any bicycle?
No. Frame compatibility is critical. You need sufficient dropout spacing for the wider axle.
Tire clearance between the frame and rim must accommodate the motor shell. Carbon frames often lack reinforcement for high torque. Horizontal dropouts offer more flexibility than vertical ones.
Always measure before buying.
How long does the installation take for a beginner?
Expect 4 to 8 hours for a first-time build. Lacing the wheel takes the most time. Truing it perfectly requires patience and skill.
Wiring and mounting components add another hour or two. Rushing leads to mistakes. Take breaks if needed.
Having a helper makes holding parts easier during bolting.
Do I need special tools for the job?
Basic mechanic tools suffice for most steps. You’ll need spoke wrenches for lacing. A torque wrench is essential for securing axle nuts and torque arms.
Wire strippers and crimpers help manage electrical connections. Multimeters verify continuity and voltage. Zip ties and heat shrink tubing organize cables neatly.
Is it legal to remove the speed limiter?
Generally, no. Modifying firmware to bypass legal speed limits violates federal and local laws. It also voids warranties and insurance coverage.
Manufacturers design limiters for safety and compliance. Tampering increases accident risk significantly. Stick to factory settings to stay lawful and protected.
What happens if my dropouts bend?
Bent dropouts compromise structural integrity. Stop riding immediately. Continued use risks catastrophic frame failure.
Minor bends might be corrected by a professional frame builder. Severe damage usually requires replacement. Prevention is key: always use thread-locker and proper torque specs on all hardware.

Similar Posts